Tip: keep a dedicated folder so every render, texture, and rig is easy to find later.
Introduction — How to Make Roblox Thumbnails the Easy Way
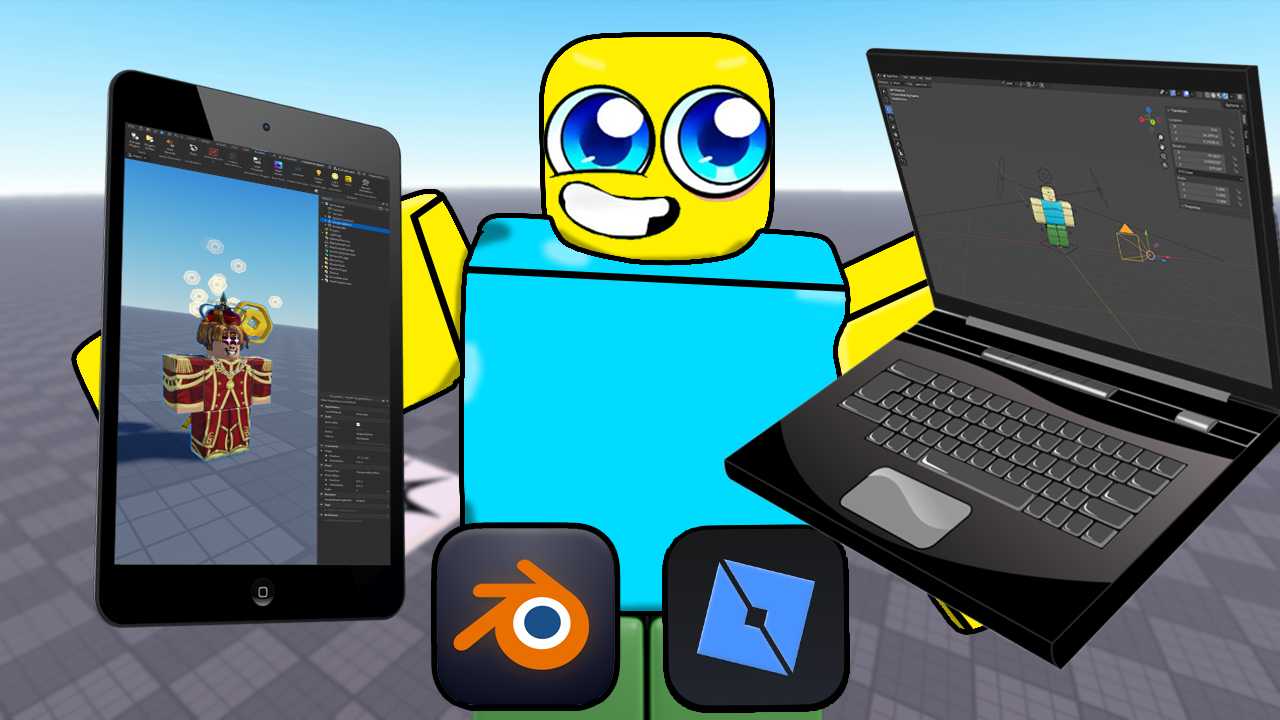
If you’re wondering how to make Roblox thumbnails that actually pop, this guide walks you through the exact workflow I use: export your avatar from Studio, pose and light it in Blender, and finish the design inside Photopea. Everything here is free, repeatable, and fast once you set it up once.

Required Software + Folder Setup (for “How to Make Roblox Thumbnails”)
Download the tools above, then create a clean folder structure so renders never get lost.
Roblox Blender/
├─ Roblox Avatar/        # textures + exported hats/mesh
├─ Renders/              # final PNG outputs
├─ Extras/               # friends' avatars (optional)
└─ Starter Rigs/         # unzip the Starter Rigs here
Exporting Your Avatar From Studio (Step 1 of How to Make Roblox Thumbnails)
- Open Roblox Studio → Baseplate.
- Plugins → Load Character → type your username → check Spawn at Origin → choose R6.
- Select all accessories (hair/hats), right-click → Export Selection → save as Roblox Avatar/hats.obj.
- Select the body/texture → Export Selection → save your texture PNGs in Roblox Avatar/.
Load Character → username → Spawn at Origin → R6
Select accessories → Export Selection → hats.obj
Select body/texture → Export Selection → textures (PNG)
Save inside /Roblox Blender/Roblox Avatar/

Blender Setup — Rig, Textures, Hats (Core of How to Make Roblox Thumbnails)
Import rig and apply textures
- Open a rig from Starter Rigs/Rigs (Blocky, 2.0, etc.).
- Go to Shading, clear the default texture, then Open your avatar PNGs.
Import and align accessories
- File → Import → Wavefront (.obj) → choose hats.obj with “Split by Group/Object”.
- Use the Move tool to align hair/hat; delete the rig head for a headless look.
- Pose Mode → select accessories → select neck bone → Ctrl+P → Bone (parent to head).
Camera, lighting, and render settings
# Camera
Add → Camera → View → Cameras → Set Active
View → Navigation → Walk Navigation (WASD) to frame subject
Output: 2000 x 2000 (or 1000 x 1000 if slow)

# Lighting (two softboxes)
Add → Light → Area (x2)
Shape: Ellipse | Power: 500–800 W each | Size: fairly large
Place left/right of the avatar, angled in toward the head

# Render
Engine: Cycles | Device: GPU Compute
Render → Film: Transparent (for PNG composites)
Render → Render Image → Image → Save As → /Renders/render_01.png

Design in Photopea — Finishing Touches for Roblox Thumbnails
Create a 1920×1080 transparent canvas, paste your render, and add a blurred in-game screenshot as background. The background blur directs focus to your avatar.
New Project → 1920×1080, DPI 300, Transparent
Paste render (Ctrl+V) → Ctrl+T to size/rotate
Background: paste screenshot → Filter → Blur → Gaussian (≈7 px)
Character outline: Layer → Blending Options → Stroke 8–10 px (black)
Rim-light look: Inner Shadow set to White, Angle ~115°, Distance 0
10 Quick Tips to Make Better Roblox Thumbnails
- Keep backgrounds simple; blur slightly so the character reads instantly.
- Use a subtle white rim-light (inner shadow) to separate the render from the scene.
- Try asymmetric poses (one foot forward, tilted head) to avoid stiffness.
- Push Vibrance in moderation; sharpen the character layer once at the end.
- Use big, simple icons (cursor/arrow) to focus attention.
- Frame the face/torso on intersections (rule of thirds) for stronger composition.
- Export PNG at full quality; keep the PSD layered for quick variants.
- Save a clean rig.blend so every new render starts posed-ready.
- Use Transparent Film in Blender to composite over anything later.
- Name files consistently: render_01.png, render_02.png…
Exporting Your Roblox Thumbnail (PNG)
Photopea → File → Export As → PNG
Quality: 100
Name: roblox-thumbnail-v1.png
Keep the layered .PSD for future edits
Related Guides (Internal Links)
Level up your project with these Roblox Studio tutorials:
- How to Make a Deathscreen in Roblox Studios
- Best Bloxstraps Fast Flags
- How to Make Text Above Your Name in Roblox Studios
FAQ — How to Make Roblox Thumbnails
What canvas size should I start with? 1920×1080 (YouTube) or 2000×2000 (square renders). Keep the character large and readable on mobile.
Should I render in Eevee or Cycles? Eevee is great for posing previews. Use Cycles for final PNGs; enable Transparent under Film.
Do I need Photoshop? No—Photopea is free and works in the browser with most Photoshop features.
SEO note: this page targets the keyphrase “How to make Roblox Thumbnails” and uses synonyms like “Roblox thumbnail tutorial” throughout headings and alt text.