Author: tallent.jude

  • How to Make a Deathscreen in Roblox Studios (Copy-Paste Code)

    How to Make a Deathscreen in Roblox Studios (Copy-Paste Code)


    How to Make a Deathscreen in Roblox Studios (Copy-Paste Code)


    Roblox Studio GUI

    How to Make a Deathscreen in Roblox Studios (Copy-Paste Code)

    TL;DR: In StarterPlayer > StarterPlayerScripts, add a LocalScript, paste the code below, and hit Play.
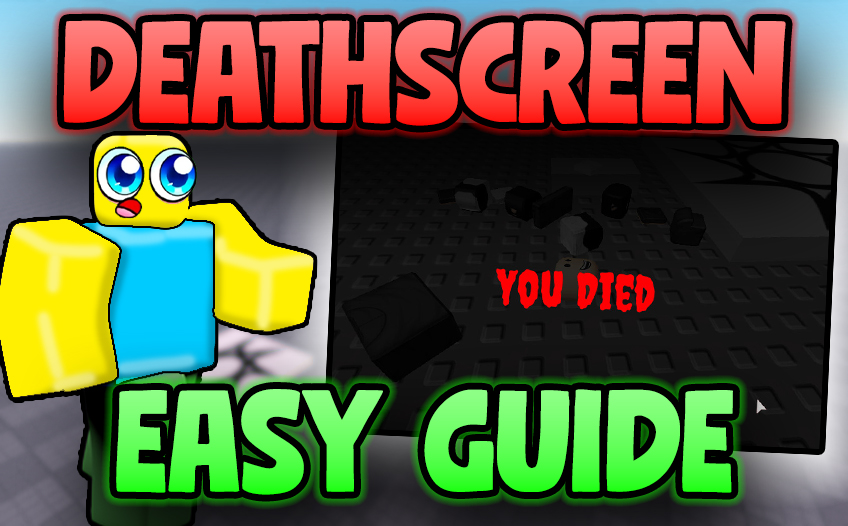
    The overlay dims the screen so you can read the text, shows YOU DIED with tiny subtext directly underneath, and auto-cleans itself 5 seconds after you respawn.

    On this page

    Copy-paste Deathscreen LocalScript

    This script listens for your Humanoid.Died event, creates a ScreenGui with a darker
    transparent tint, renders a centered YOU DIED headline, then a very small, lighter subtext directly under it
    (“man you suck”). After you respawn, it automatically removes itself after 5 seconds.

    lua — LocalScript (StarterPlayerScripts)
    -- Death Screen LocalScript (StarterPlayerScripts)
    local Players = game:GetService("Players")
    local player = Players.LocalPlayer
    
    local deathGui -- will hold the ScreenGui instance
    
    local function showDeathScreen()
    	-- Remove old one if it exists
    	if deathGui then
    		deathGui:Destroy()
    		deathGui = nil
    	end
    
    	deathGui = Instance.new("ScreenGui")
    	deathGui.Name = "DeathScreen"
    	deathGui.ResetOnSpawn = false
    	deathGui.IgnoreGuiInset = true
    	deathGui.Parent = player:WaitForChild("PlayerGui")
    
    	-- Background tint (darker, semi-transparent)
    	local background = Instance.new("Frame")
    	background.Size = UDim2.fromScale(1, 1)
    	background.BackgroundColor3 = Color3.new(0, 0, 0)
    	background.BackgroundTransparency = 0.3 -- darker tint, adjust between 0.3-0.5 to taste
    	background.Parent = deathGui
    
    	-- Main "YOU DIED" text
    	local label = Instance.new("TextLabel")
    	label.Size = UDim2.new(1, 0, 0.2, 0)
    	label.Position = UDim2.fromScale(0, 0.35)
    	label.BackgroundTransparency = 1
    	label.Text = "YOU DIED"
    	label.TextScaled = true
    	label.Font = Enum.Font.GothamBold
    	label.TextColor3 = Color3.new(1, 1, 1)
    	label.Parent = background
    
    	-- Small subtext directly under the main text
    	local subLabel = Instance.new("TextLabel")
    	subLabel.Size = UDim2.new(1, 0, 0.05, 0) -- much smaller height
    	subLabel.Position = UDim2.new(0, 0, 0.53, 0) -- right below main text
    	subLabel.BackgroundTransparency = 1
    	subLabel.Text = "man you suck"
    	subLabel.TextScaled = true
    	subLabel.Font = Enum.Font.Gotham
    	subLabel.TextColor3 = Color3.fromRGB(200, 200, 200)
    	subLabel.Parent = background
    end
    
    local function hookHumanoid(humanoid)
    	humanoid.Died:Connect(function()
    		showDeathScreen()
    	end)
    end
    
    local function onCharacterAdded(char)
    	-- after respawn, remove death screen after 5 seconds
    	if deathGui then
    		task.delay(5, function()
    			if deathGui then
    				deathGui:Destroy()
    				deathGui = nil
    			end
    		end)
    	end
    
    	local hum = char:FindFirstChildOfClass("Humanoid") or char:WaitForChild("Humanoid", 10)
    	if hum then
    		hookHumanoid(hum)
    	end
    end
    
    if player.Character then onCharacterAdded(player.Character) end
    player.CharacterAdded:Connect(onCharacterAdded)
    

    Optional: quick “kill brick” to test

    Drop a Part into the workspace and paste this tiny Script inside it. Touch it to trigger your deathscreen instantly.

    lua — Script inside a Part
    -- Simple Kill Brick (Script inside a Part)
    local part = script.Parent
    part.Touched:Connect(function(hit)
      local hum = hit.Parent:FindFirstChildOfClass("Humanoid")
      if hum and hum.Health > 0 then
        hum.Health = 0
      end
    end)

    For more polish later, swap “man you suck” for a friendlier subtitle, add a respawn button, or fade the background in/out.

    Steps: how to make a deathscreen in Roblox Studios

    1. Create a LocalScript: Explorer → StarterPlayer > StarterPlayerScripts → LocalScript.
    2. Paste the code: Use the blue Copy code button above and paste into the new LocalScript.
    3. Playtest: Press Play. When your character dies, the screen tints darker, shows YOU DIED with a very small subtext right under it, and cleans up 5s after respawn.
    4. Optional test part: Use the kill brick script to trigger death on touch.

    Best practices

    • Keep ResetOnSpawn = false so the GUI persists across the death/respawn boundary until your delayed cleanup runs.
    • Use IgnoreGuiInset = true to cover the whole screen evenly.
    • Balance readability with a BackgroundTransparency around 0.3–0.5.
    • Hook Humanoid.Died every time a new character spawns (that’s what CharacterAdded is for).

    FAQ & troubleshooting

    No GUI appears? Make sure the script is a LocalScript inside StarterPlayerScripts (client context). Also confirm you’re in Play mode, not just editing.

    Text is too small/large? This guide uses TextScaled = true so it auto-sizes. Adjust the Position and Size if you want the subtitle closer or farther.

    Want 10 seconds instead of 5? Change the value in task.delay(5, …).

    Need different fonts? Swap Enum.Font.GothamBold/Enum.Font.Gotham to your preferred fonts.

    Suggested WordPress tags (copy these into your post tags)

    how to make a deathscreen in roblox studios, roblox death screen tutorial, roblox studio gui, roblox “you died” text,
    roblox local script, starterplayerscripts, humanoid.died, roblox screen gui, roblox overlay dim screen, roblox respawn ui,
    roblox gotham font, roblox textlabel center, roblox kill brick script, roblox copy paste code, roblox beginner tutorial,
    roblox lua gui basics, roblox death ui, roblox studios guide, roblox overlay tutorial, roblox script examples

    Primary keyword repeats naturally throughout this page: how to make a deathscreen in roblox studios.
    (Roblox “Studio” is the correct product name; we include both to catch searches.)

    Further Reading

    See community tips and examples on Reddit:
    How to make a Roblox death screen (r/RobloxStudio_devs).


  • Beanstalk Event – Grow a Garden (Update 1.19.0) Guide, Rewards & Shop

    Beanstalk Event – Grow a Garden (Update 1.19.0) Guide, Rewards & Shop


    Beanstalk Event – Grow a Garden (Update 1.19.0) Guide, Rewards & Shop


    Grow a Garden Beanstalk Event hero image – Update 1.19.0
    Important Post
    All about the Beanstalk Event (Update 1.19.0)

    Beanstalk Event – Grow a Garden (Update 1.19.0)

    Every hour, servers feed a magical Beanstalk to reach the Giants in the sky—then shop at Goliath’s Goods for exclusive seeds, eggs, and cosmetics. Below is the full guide to growth rules, categories Jack requests, restock math, shop stock, items, pets, and FAQs.

    Overview

    Dates: August 16–23, 2025 • Event Currency: Sheckles

    The Beanstalk Event is part of Update 1.19.0 for Grow a Garden. Every hour the server converts submitted fruit into fertilizer to grow a massive Beanstalk toward the Giants. Reach the top to access the Goliath’s Goods shop for unique rewards.

    Mechanics

    Beanstalk Growth

    • Submit plants matching Jack’s requested category to contribute fertilizer and grow the Beanstalk.
    • Requests rotate hourly; categories include Berry, Candy, Flower, Fruit, Fungus, Leafy, Night, Prehistoric, Prickly, Sour, Spicy, Stalky, Summer, Sweet, Toxic, Tropical, Vegetable, Woody, and Zen.
    • More total weight = faster progress; coordinate with your server for peak growth.

    Goliath’s Goods

    • Unlocks at the top of the fully grown Beanstalk.
    • Restock: auto every 60 minutes.
    • Manual restock: starts at 500,000 Sheckles and doubles each purchase (500,000 × 2^n), resets daily at 12:00 AM UTC.

    Jack’s Requested Categories

    Tip: dump extras from farms you don’t need—heavy stacks push the Beanstalk fastest. Below lists everything Jack can ask for.

    Berry

    BlueberryCelestiberryCranberryElder StrawberryGrapeLingonberryRaspberryStrawberryWhite Mulberry

    Candy

    Blue LollipopCandy BlossomCandy SunflowerEaster EggRed LollipopSugarglaze

    Flower

    Bee BalmBurning BudCandy BlossomCandy SunflowerCherry BlossomCrocusDaffodilDelphiniumEmber LilyEnkakuFirework FlowerFoxgloveGrand VolcaniaHinomaiHoneysuckleLavenderLiberty LilyLilacLily Of The ValleyLotusManuka FlowerMonobloomaMoon BlossomMoonflowerNightshadeNoble FlowerOrange TulipParasol FlowerPink LilyPink TulipPurple DahliaRafflesiaRoseRosy DelightSerenitySoft SunshineStonebiteSucculentSunflowerTaro FlowerVeinpetalZenflare

    Fruit

    AppleAvocadoBananaBlood BananaBlueberryCelestiberryCoconutCranberryCrown MelonDragon FruitDurianGrand TomatoGrapeGreen AppleHive FruitKiwiLemonLimeLingonberryLoquatMangoMaple AppleMoon MangoMoon MelonNectarinePapayaPassionfruitPeachPearPineappleRaspberryStarfruitStrawberrySugar AppleTraveler’s FruitWatermelonWhite Mulberry

    Fungus

    GlowshroomHorned DinoshroomMega MushroomMushroomNectarshadeSinisterdrip

    Leafy

    Aloe VeraAppleBeanstalkBee BalmBlood BananaBlueberryCacaoCantaloupeCauliflowerCelestiberryCocovineCranberryEggplantElephant EarsFirefly FernFoxgloveGiant PineconeGrand TomatoGrapeGreen AppleHive FruitHoneysuckleLilacLily Of The ValleyLumiraMangoMaple AppleMintMoon BlossomMoon MangoMoonflowerNectarineNoble FlowerParasol FlowerPeachPineapplePink LilyPitcher PlantPumpkinPurple DahliaRafflesiaRaspberryRoseRosy DelightSpiked MangoStarfruitStrawberrySugar AppleSunflowerTomatoTraveler’s FruitTwisted TangleWatermelon

    Night

    Blood BananaCelestiberryGlowshroomMintMoon BlossomMoon MangoMoon MelonMoonflowerNightshadeStarfruit

    Prehistoric

    Amber SpineBone BlossomBonebooFirefly FernFossilightGrand VolcaniaHorned DinoshroomHorsetailLingonberryParadise PetalStonebite

    Prickly

    Aloe VeraCactusCelestiberryDragon FruitDurianHorned DinoshroomNectar ThornPineapplePricklefruitPrickly PearSpiked MangoTwisted TangleVenus Fly Trap

    Sour

    CranberryLemonLimePassionfruitStarfruit

    Spicy

    Bell PepperCacaoCursed FruitDragon PepperEmber LilyGrand VolcaniaHorned DinoshroomJalapenoPapayaPepper

    Stalky

    BambooBeanstalkBendbooBonebooBurning BudCocovineDandelionElephant EarsFirefly FernGrand VolcaniaHorned DinoshroomLily Of The ValleyLotusLucky BambooMushroomPitcher PlantSpring OnionStonebiteSugarglazeTall AsparagusVeinpetal

    Summer

    Aloe VeraAvocadoBananaBell PepperBlueberryButternut SquashCantaloupeCarrotCauliflowerDelphiniumElephant EarsFeijoaGreen AppleGuanabanaKiwiLily Of The ValleyLoquatParasol FlowerPeace LilyPearPineapplePitcher PlantPrickly PearRafflesiaRosy DelightStrawberrySugar AppleTomatoTraveler’s FruitWatermelonWild Carrot

    Sweet

    BananaBlue LollipopBlueberryCandy BlossomCandy SunflowerChocolate CarrotCrown MelonEaster EggGrapeMangoMoon MelonNectar ThornPeachPearPineappleRaspberryRed LollipopSpiked MangoStarfruitStrawberrySugar AppleSugarglazeWatermelon

    Toxic

    FoxgloveNightshade

    Tropical

    BananaCoconutCocovineDragon FruitDurianMangoPapayaParasol FlowerPassionfruitPineappleStarfruitWatermelon

    Vegetable

    AvocadoBeanstalkBell PepperCarrotCauliflowerChocolate CarrotCornDragon PepperEggplantGrand TomatoJalapenoKing CabbageMintOnionPepperPumpkinPurple CabbageRhubarbTall AsparagusTaro FlowerTomatoViolet CornWild Carrot

    Woody

    AppleAvocadoCacaoCoconutCocovineDurianFeijoaGiant PineconeHive FruitKiwiMangoMaple AppleMoon BlossomMoon MangoNectarinePapayaPeachPearRhubarbTraveler’s Fruit

    Zen

    DezenEnkakuHinomaiLucky BambooMaple AppleMonobloomaSakura BushSerenitySoft SunshineSpiked MangoTaro FlowerTranquil BloomZen RocksZenflare

    Goliath’s Goods — Stock & Requirements

    Item Image Sheckles Robux Requirement
    Sprout Seed Pack Sprout Seed Pack - Beanstalk Event Unknown 199 None
    Sprout Egg Sprout Egg - Beanstalk Event Unknown 149 Help grow the Beanstalk 2×
    Mandrake Seed Mandrake Seed - Beanstalk Event Unknown Unknown Help grow the Beanstalk 2×
    Sprout Crate Sprout Crate - Beanstalk Event Unknown Unknown Help grow the Beanstalk 3×
    Silver Fertilizer Silver Fertilizer - Beanstalk Event Unknown 129 Help grow the Beanstalk 4×
    Canary Melon Seed Canary Melon Seed - Beanstalk Event Unknown Unknown Help grow the Beanstalk 5×
    Spriggan (Pet) Spriggan Pet - Beanstalk Event Unknown Unknown Help grow the Beanstalk 6×

    Manual restock doubles each time you buy it, then resets daily at 00:00 UTC.

    Event Items & Rewards

    Event Seeds & Plants

    Canary Melon SeedMandrake SeedAmberheart SeedFlare Daisy SeedDuskpuff SeedMangosteen SeedPoseidon Plant SeedGleamroot SeedPrincess Thorn Seed

    Event Items & Cosmetics

    Sprout Seed PackExotic Sprout Seed PackSprout EggSprout CratePet PouchSilver Fertilizer

    Event Pets

    Dairy CowJackalopeSaplingGolemGolden GooseSpriggan

    Trivia

    • First event centered around a specific crop: Beanstalk.
    • Originally planned before the Cooking Event but arrived after due to a community poll.

    FAQ

    How often does Goliath’s Goods restock?

    Automatically every 60 minutes. Manual restock starts at 500,000 Sheckles and doubles after each purchase; it resets daily at 12:00 AM UTC.

    How do I help the Beanstalk grow?

    Submit plants matching Jack’s current category. He rotates requests hourly. Heavier contributions push progress faster.

    Where can I get instant stock alerts?

    Join the Grow a Garden stock notifier Discord for pings and predictive restock timing.

    Related: Check the previous Cooking Event – All Recipes & Rewards.


  • Grow a Garden Stock Notifier (Discord) – Predictive Restock Pings

    Grow a Garden Stock Notifier (Discord) – Predictive Restock Pings


    Grow a Garden Stock Notifier (Discord) – Predictive Restock Pings


    Grow a Garden

    Predictive Stock Notifier (Discord)

    Plants refresh every 5 minutes. Eggs refresh every 30 minutes. Stop guessing—get pinged right when it flips back in stock.


    Join the notifier – be first in line

    This server predicts the next restock window and fires role-based alerts the moment items come back.


    Join the Discord


    https://discord.gg/growagardens

    Next plant refresh (every 5 min)

    Next egg refresh (every 30 min)

    Why this notifier is OP

    • Prediction + Ping: be there early instead of reacting late.
    • Role-based alerts: opt into exactly what you care about (eggs, specific plants, seeds, etc.).
    • Noise-free: clean channel alerts; DMs optional.
    • Free to join: hop in, grab your roles, camp the refresh.

    FAQ

    How often are refreshes? Plants: every 5 minutes. Eggs: every 30 minutes.

    Is this official? No—community tool. Not affiliated with Roblox or Grow a Garden.

    Do I need Discord open? Notifications work on desktop/mobile; channel history shows recent flips.

    Not affiliated with Roblox or Grow a Garden. Timers are estimates; actual server timing may vary slightly.

    © 2025 RobloxTutorial • Built by SargantZafron


  • Grow a Garden Cooking Recipes

    Grow a Garden Cooking Recipes


    Grow a Garden Cooking Event – Complete Recipes (Aug 2025)


    Grow a Garden – Cooking Event (Aug 2–16, 2025)

    All mechanics, rewards, Kitchen Storm, and every known cooking recipe by rarity.

    Overview

    The Cooking Event is part of Update 1.17.0. It premiered on August 2, 2025 and is expected to end on August 16, 2025. Trading launched with this update.

    Mechanics

    • Heavier plants and more total ingredients add more time to the pot but yield more points and better rewards.
    • More dish points = better/more rewards.
    • If the dish matches Chris P.’s craving, it upgrades by +1 tier (e.g., Divine → Prismatic).
    ✅ confirmed⌛ needs testing🔄 craving-only➡️ order-specific❌ not working / soup

    Cooking Rewards

    Reward Tier
    500 Sheckles Common
    Mutation Spray – Burnt ×1 Common
    Fork Fence ×1 Common
    Watering Cans ×5 Common
    Food Crate ×1 Uncommon
    Reclaimer ×1 Uncommon
    Corn Seeds ×3 Uncommon
    Gourmet Seed Pack ×1 Rare
    Artichoke Seed ×1 Rare
    Advanced Sprinkler ×1 Rare
    Small Toy ×2 Legendary
    Gourmet Egg ×1 Legendary
    Mutation Spray – HoneyGlazed ×2 Legendary
    Pretzel Cart ×1 Mythical
    Gourmet Seed Packs ×2 Mythical
    Medium Toy ×1 Mythical
    Mochi Mouse ×1 Divine
    Food Crates ×2 Divine
    Pet Mutation Shard – Fried ×1 Divine
    Mutation Spray – Fried ×3 Divine
    Pancake Stack Cosmetic ×1 Prismatic
    Taco Fern Seed ×1 Prismatic
    Gourmet Eggs ×3 Prismatic
    Gourmet Seed Packs ×4 Prismatic

    Kitchen Storm Event

    Give a mutated fruit to the Rat Connoisseur for one of these rewards:

    Reward Chance
    Gourmet Egg ×1 50%
    Kitchen Crate ×1 50%
    Gourmet Seed Pack ×1 50%
    Culinarian Chest ×1 40%
    Spring Onion Seed ×1 30%
    Cooking Cauldron ×1 30%
    Kitchen Flooring ×1 30%
    Sunny-Side Chicken ×1 30%
    Kitchen Cart ×1 20%
    Pet Mutation Shard – Aromatic ×1 20%
    Smoothie Fountain ×1 15%
    Butternut Squash Seed ×1 8%
    Pricklefruit Seed ×1 5%
    Gorilla Chef ×1 5%
    Bitter Melon Seed ×1 3%

    Cooking Recipes

    Grades: Normal · Rare · Legendary · Mythical · Divine · Prismatic · Transcendent (40kg+ per ingredient recommended).
    Disclaimer: not every possible recipe—these are the ones discovered so far.

    Salad

    Normal

    1. ✅ 2× Tomato
    2. ✅ Tomato + Carrot
    3. ✅ Onion + Pear
    4. ✅ 5× Tomato
    5. ✅ Tomato + Onion
    6. ✅ 2× Tomato + 2× Strawberry + Raspberry
    7. ✅ Tomato + Carrot + Strawberry + Bell Pepper
    8. ⌛ 4× Onion

    Rare

    1. ✅ Lilac + Pear + Tomato
    2. ✅ 2× Tomato + Hinomai
    3. ✅ Liberty Lily + Mango + 3× Tomato

    Legendary

    1. ✅ 2× Blood Banana + 2× Tomato
    2. ✅ Bamboo + Mango + Pineapple + Tomato + Beanstalk
    3. ✅ Bamboo + Beanstalk + Strawberry
    4. ✅ Mango + Tomato
    5. ✅ Artichoke + Sugar Apple

    Mythical

    1. ✅ Tomato + Prismatic Crop
    2. ✅ Tomato + 2× Pepper
    3. ✅ Bamboo + Pepper
    4. ✅ Tomato + Pepper + Sugar Apple
    5. ✅ Tomato + Bone Blossom
    6. ✅ Bamboo + Sugar Apple + 2× Bamboo + Beanstalk

    Divine

    1. ✅ Tomato + 3× Prismatic Crop
    2. ✅ Pineapple + Pepper + 3× Prismatic Crop
    3. ✅ 4–5× Grand Tomato
    4. ✅ 2× Tomato + 3× Bone Blossom
    5. ✅ 2× Mango + 2× Bone Blossom + Bell Pepper
    6. ✅ Beanstalk + Pineapple
    7. ✅ Onion + 3× Prismatic Crops

    Prismatic

    1. ✅ Tomato + 4× Bone Blossom
    2. ✅ Grand Tomato + Bone Blossom
    3. 🔄 Bamboo + Beanstalk + 3× Bone Blossom
    4. ✅ 4× Beanstalk + Jalapeño
    5. ✅ Tomato + 3× Prismatic Crop

    Transcendent

    1. ✅ Grand Tomato (or Tomato) + 4× Bone Blossom
    2. ✅ 2× Giant Pinecone + 2× Bone Blossom + Bell Pepper

    Sandwich

    Normal

    1. ✅ 2× Tomato + Corn

    Legendary

    1. ✅ 2× Giant Pinecone + Tomato + Corn
    2. ✅ Tomato + Corn + Cacao
    3. ✅ Tomato + Corn + Elder Strawberry

    Mythical

    1. ✅ 🔄 Tomato + Corn + Elder Strawberry + Sugar Apple + Ember Lily

    Divine

    1. 🔄 ✅ 3× Bone Blossom + Tomato + Corn (or Violet Corn)
    2. ➡️ 🔄 ✅ 3× Prismatic Crop + Tomato + Corn

    Prismatic

    1. ✅ 🔄 Corn + 3× Elder Strawberry + Tomato

    Pie

    Legendary

    1. ⌛ Pumpkin + Giant Pinecone + Corn + Apple
    2. ⌛ Pumpkin + Pineapple
    3. ✅ Jalapeño + Taco Fern + Tall Asparagus + Crown Melon + Twisted Tangle
    4. ✅ Coconut + Pepper + Dragon Fruit + Strawberry

    Mythical

    1. ✅ Apple + Pumpkin (shows as Legendary?)
    2. ✅ 🔄 Pumpkin + Beanstalk (also Waffle)
    3. ✅ Pumpkin + Ember Lily
    4. ✅ Beanstalk + 3× Coconut

    Divine

    1. ❌ Coconut + Beanstalk (now Smoothie)
    2. ✅ Sugarglaze + Beanstalk
    3. ✅ Pepper + Coconut + 2× Elder Strawberry + Celestiberry/Firefly Fern
    4. ✅ 3× Sugar Apple + Pumpkin
    5. ✅ Burning Bud + Prickly Pear + Bone Blossom + Giant Pinecone + Coconut
    6. ✅ Bone Blossom + Crown Melon + Fossilight + 2× Sugar Apple

    Prismatic

    1. ✅ 4× Bone Blossom + Pumpkin
    2. ✅ 2× Bone Blossom + Coconut (4× also works to add weight)
    3. ✅ 3× Bone Blossom + Sugar Apple + Coconut
    4. 🔄 ✅ 3× Bone Blossom + Sugar Apple + Sugarglaze (also Waffle/Ice Cream/Cake)

    Transcendent

    1. ✅ Pumpkin + 4× Bone Blossom
    2. ✅ Coconut + 4× Bone Blossom

    Waffle

    Normal

    1. 🔄 Pumpkin + Watermelon
    2. ✅ Strawberry + Coconut

    Rare

    1. 🔄 ⌛ Sugarglaze + 2× Jalapeño
    2. ⌛ 3× Crown Melon

    Legendary

    1. ✅ Coconut + Apple + Dragon Fruit + Mango
    2. ⌛ 2× Raspberry + 3× Coconut
    3. 🔄 ⌛ Sugarglaze + 2× Dragon Fruit + 2× Tomato

    Mythical

    1. ✅ Coconut + Pineapple
    2. ✅ Grape + Coconut + Dragon Fruit + Cactus + Peach
    3. ✅ Coconut + Sugarglaze
    4. ✅ 2× Coconut + 2× Mango
    5. ⌛ Bone Blossom + Apple + Sugarglaze + Paradise Petal + Taco Fern
    6. ⌛ Mango + Crown Melon + Sugar Apple + Pineapple + Peach

    Divine

    1. ✅ Sugar Apple + Coconut
    2. 🔄 ✅ Corn + Crown Melon + 3× Sugar Apple
    3. ✅ Sugar Apple + Blood Banana + Sugarglaze + Grape + Bone Blossom
    4. 🔄 ✅ Sugarglaze + 1–3× Sugar Apple

    Prismatic

    1. ➡️ 🔄 ✅ Sugar Apple + Coconut + 3× Bone Blossom
    2. 🔄 ✅ Sugarglaze + Cacao + 3× Bone Blossom
    3. 🔄 ✅ Sugarglaze + 2× Bone Blossom

    Transcendent

    1. 🔄 ✅ Sugarglaze + Sugar Apple + 3× Bone Blossom (makes many cravings)
    2. Sugar Apple + Coconut + 3× Bone Blossom

    Hot Dog

    Normal

    1. ⌛ 2× Corn + Watermelon
    2. ⌛ Pepper + Banana
    3. ⌛ 2× Bone Blossom + Pepper + Corn
    4. ⌛ 1–2× Bone Blossom + Violet Corn

    Legendary

    1. ✅ Pepper + Corn
    2. ✅ 2× Violet Corn + 2× Lucky Bamboo + Bone Blossom
    3. ⌛ Bell Pepper + Violet Corn
    4. ⌛ Zenflare + Taco Fern + Cauliflower + Amber Spine + Liberty Lily
    5. ✅ Banana + Pepper + Horsetail

    Mythical

    1. ✅ Ember Lily + Corn
    2. ✅ Corn + Bone Blossom
    3. 🔄 Pepper + Banana
    4. ⌛ Pepper + Violet Corn
    5. 🔄 ⌛ Cocovine + Bone Blossom + Lumira + Banana + Kiwi

    Divine

    1. ✅ 4× Ember Lily + Corn
    2. ✅ 2× Bone Blossom + 2× Beanstalk + Corn
    3. ✅ 3× Bone Blossom + Banana + Blood Banana
    4. ➡️ ✅ 3× Bone Blossom + Lucky Bamboo + Violet Corn/Corn
    5. ✅ 3× Beanstalk + Pepper + Corn

    Prismatic

    1. ✅ Corn + 4× Bone Blossom
    2. ✅ Violet Corn + Beanstalk + 3× Bone Blossom
    3. ✅ 🔄 Violet Corn + Elder Strawberry + 3× Bone Blossom

    Transcendent

    1. 🔄 ✅ Violet Corn + 4× Bone Blossom
    2. ✅ Corn + 4× Bone Blossom

    Ice Cream

    Normal

    1. ✅ Corn + Blueberry
    2. ✅ Corn + Strawberry

    Rare

    1. ⌛ Corn + Raspberry

    Legendary

    1. ✅ 2× Banana
    2. ✅ Banana + Lingonberry
    3. ✅ Corn + Mango
    4. ✅ Corn + Spiked Mango
    5. ✅ Banana + Coconut
    6. ✅ Sugarglaze + Soft Sunshine

    Mythical

    1. ✅ Sugar Apple + Banana
    2. ✅ Sugar Apple + Corn
    3. ⌛ Mango + Cacao + Grape + Corn
    4. ✅ Mango + Sugarglaze

    Divine

    1. ✅ Sugar Apple + Sugarglaze
    2. ✅ 🔄 3× Sugar Apple + Corn
    3. ✅ 2× Sugar Apple + Banana + Tranquil Bloom + Bone Blossom
    4. 🔄 ✅ Banana + Sugar Apple + 3× Ember Lily
    5. ✅ Banana + Apple + 3× Bone Blossom

    Prismatic

    1. 🔄 ✅ Sugarglaze + Sugar Apple + 3× Bone Blossom (also Pie/Waffle/Donut/Cake)
    2. ✅ 🔄 Banana + Sugar Apple + 3× Bone Blossom
    3. ✅ 🔄 Banana + 4× Bone Blossom
    4. 🔄 ✅ Sugarglaze + 2–4× Bone Blossom

    Transcendent

    1. 🔄 ✅ Sugarglaze + Sugar Apple + 3× Bone Blossom (also Pie/Waffle/Donut/Cake)

    Donut

    Normal

    1. ⌛ Strawberry + Tomato + Apple
    2. ⌛ 2× Corn + Watermelon
    3. ⌛ 2× Corn + Banana + Pumpkin

    Rare

    1. ✅ Corn + Blueberry + Apple
    2. ⌛ Watermelon + Corn
    3. ⌛ Corn + Spiked Mango
    4. ✅ Tomato + Banana + 2× Corn
    5. ⌛ 2× Tomato + Sugarglaze + 2× Rose
    6. ✅ Cauliflower + 4× Candy Blossom

    Legendary

    1. ✅ Corn + any Crop + Sugar Apple
    2. ⌛ Sugarglaze + Green Apple + Peach
    3. ⌛ Sugarglaze + Apple + Peach
    4. ⌛ Sugarglaze + Cactus + Banana
    5. ✅ 🔄 2× Mango + 2× Corn

    Mythical

    1. ✅ 2× Sugar Apple + Corn
    2. ✅ Sugar Apple + 2× Corn
    3. ✅ 2× Cacao + Sugarglaze
    4. ⌛ Sugarglaze + Fossilight + Enkaku + Cactus + Beanstalk
    5. ⌛ Sugarglaze + Burning Bud + Pepper + Corn + Coconut
    6. ⌛ 2× Grape + Sugarglaze

    Divine

    1. ✅ Banana + 2× Prismatic Crop
    2. ✅ Sugarglaze + 2× Prismatic Crop
    3. ✅ ➡️ Corn + 3× Prismatic Crop (≥1 Sweet Type)
    4. ✅ 3× Sugar Apple + Taco Fern + Sugarglaze
    5. ✅ 4× Sugar Apple + Sugarglaze
    6. 🔄 2× Sugar Apple + Veinpetal + Banana + Bone Blossom
    7. ✅ 🔄 Violet Corn + 2× Sugar Apple

    Prismatic

    1. 🔄 ✅ Sugar Apple + Sugarglaze + 3× Bone Blossom (also Waffle/Pie/Ice Cream/Cake)
    2. ✅ 🔄 3× Bone Blossom + Sugar Apple + Banana
    3. ✅ (cravings) Sugarglaze + 2× Bone Blossom
    4. ✅ 🔄 Taco Fern + Sugarglaze + 3× Bone Blossom
    5. ✅ 🔄 Banana + 3–4× Bone Blossom

    Transcendent

    1. 🔄 ✅ Beanstalk + Sugarglaze + 3× Bone Blossom
    2. 🔄 ✅ Sugarglaze + 4× Bone Blossom

    Pizza

    Normal

    1. ✅ Strawberry + Pepper + Corn + Tomato

    Legendary

    1. ✅ 2× Corn + 2× Apple + Pepper
    2. ⌛ Bell Pepper + Pepper + Tomato + Corn + Peach
    3. ⌛ Cauliflower + Paradise Petal + 2× Blood Banana + Pepper
    4. ✅ Giant Pinecone + Corn + Apple + Pepper + Strawberry
    5. ⌛ Bell Pepper + Pepper + Tomato + Corn + Pineapple

    Mythical

    1. ✅ Pepper + Tomato + Corn + 2× Sugar Apple
    2. ✅ Giant Pinecone + Apple + Pepper + Banana + Mushroom
    3. ✅ Sugar Apple + Pepper + Banana

    Divine

    1. ✅ Sugar Apple + Corn + 3× Bone Blossom
    2. ✅ 3× Sugar Apple + Corn + Pepper
    3. ✅ Pepper + Corn + Sugar Apple + 2× Giant Pinecone

    Prismatic

    1. ✅ Violet Corn + Sugar Apple + 3× Bone Blossom
    2. ✅ Banana + Beanstalk + 3× Bone Blossom
    3. ➡️ 🔄 ✅ Grand Tomato + Sugarglaze + 3× Bone Blossom
    4. ✅ Sugar Apple + Beanstalk + Sugarglaze + 2× Bone Blossom

    Transcendent

    1. ✅ ➡️ Beanstalk + Banana + 3× Bone Blossom (can become Transcendent Cake)

    Sushi

    All known recipes contain both Bamboo and Corn / Violet Corn.

    Normal

    1. ✅ 4× Bamboo + Corn

    Rare

    1. ✅ Bamboo + 2× Corn + Spiked Mango
    2. ✅ Corn + 2× Tomato + Bamboo

    Legendary

    1. ✅ 3× Bamboo + Corn + Maple Apple
    2. ⌛ 3× Bamboo + Hive Fruit + Corn
    3. ✅ Bamboo + Lilac + Lucky Bamboo + Mango + Violet Corn

    Mythical

    1. ✅ 2× Bamboo + Corn + 2× Bone Blossom
    2. ✅ 3× Sugar Apple + Bamboo + Corn
    3. ✅ Corn + Bamboo + 3× Elder Strawberry
    4. 🔄 ✅ Bamboo + Corn + 2× Bone Blossom
    5. ✅ Bamboo + Corn + 3× Dragon Pepper

    Divine

    1. ✅ Corn/Violet Corn + Bamboo + 3× Bone Blossom

    Prismatic

    1. No known recipes

    Cake

    Normal

    1. ✅ 2× Corn + 2× Strawberry
    2. ✅ 2× Blueberry + Corn + Tomato
    3. ✅ 2× Banana + 2× Strawberry + Pumpkin

    Rare

    1. ✅ 2× Corn + 2× Watermelon
    2. ✅ 2× Corn + 2× Banana + Watermelon
    3. ✅ Blueberry + Grape + Apple + Corn
    4. ✅ 2× Tomato + 2× Banana

    Legendary

    1. ✅ 2× Kiwi + 2× Banana
    2. ✅ 2× Banana + Blood Banana + Moon Melon + Soft Sunshine
    3. ✅ (not craving donuts) 2× Corn + 2× Mango
    4. ⌛ Cauliflower + Apple + Sugar Apple + Corn + Tomato

    Mythical

    1. ✅ 2× Sugar Apple + 2× Corn
    2. 4× Sweet-Type Crops + Corn
    3. ✅ Sakura Bush + Cacao + Corn + Giant Pinecone + Spiked Mango
    4. ✅ Sakura Bush + Sugar Apple + Corn + Bone Blossom
    5. ⌛ Banana or Corn + Kiwi + 3× Bone Blossom

    Divine

    1. ✅ Banana + 3× Prismatic Crop
    2. ✅ Corn + 2× Elder Strawberry + 2× Sugar Apple
    3. 🔄 Corn + Sugar Apple + 2× Prismatic Crop
    4. ✅ Corn + 4× Sugar Apple

    Prismatic

    1. ✅ (swaps to Pie/Waffle/Ice Cream/Donut if craving) Sugarglaze + Sugar Apple + 3× Bone Blossom
    2. 🔄 ✅ Banana + 3–4× Bone Blossom
    3. 3× Beanstalk + Grand Volcania + Banana

    Transcendent

    1. 🔄 ✅ Banana + Sugar Apple + 3× Bone Blossom

    Burger

    Legendary

    1. ✅ Pepper + Corn + Tomato
    2. ✅ 2× Bell Pepper + Violet Corn

    Mythical

    1. ✅ Pepper + Corn + Tomato + Bone Blossom + Beanstalk
    2. ✅ Pepper + Corn + Tomato + 2× Beanstalk
    3. ✅ 2× Sugar Apple + Pepper + Corn + Tomato
    4. ✅ Ember Lily + 2× Beanstalk + Corn + Artichoke

    Divine

    1. ✅ Corn/Violet Corn + Tomato + 3× Bone Blossom
    2. ✅ Sugarglaze + Tomato + 3× Bone Blossom
    3. ✅ Corn + (Tomato or Grand Tomato) + Elder Strawberry + 2× Bone Blossom

    Prismatic

    1. ✅ Sugarglaze + Grand Tomato + 3× Bone Blossom

    Transcendent

    1. ✅ Sugarglaze + Grand Tomato + 3× Bone Blossom

    Smoothie

    Mythical

    1. ✅ Jalapeño + Crown Melon + Lingonberry + Bell Pepper
    2. ✅ 5× Apple

    Divine

    1. Dragon Fruit + 1–2× Coconut + Rosy Delight + Moonflower
    2. Coconut + Beanstalk
    3. 3× Coconut + 2× Sugar Apple
    4. Coconut + Giant Pinecone
    5. Mango + Sugar Apple

    Prismatic

    1. 3× Sugar Apple + 1–2× Coconut
    2. (was Pie) 2× Bone Blossom + Coconut
    3. Elephant Ears + Easter Egg + Grape + Moon Blossom + Elder Strawberry
    4. ✅ Sugar Apple + Ember Lily

    Transcendent

    1. ✅ Sugar Apple + Coconut + 3× Bone Blossom
    2. Sugar Apple + Bone Blossom
    3. 3× Bone Blossom + Coconut
    4. ✅ Sugar Apple + 4× Prismatic Crop

    Candy Apple

    Divine

    1. Sugar Apple + Sugarglaze

    Sweet Tea

    Transcendent

    1. ✅ 2× Candy Blossom + 3× Bone Blossom

    Porridge

    Prismatic

    1. ✅ Corn + 4× Sugar Apple
    2. ✅ 3× Bone Blossom + Sugar Apple + Corn
    3. ✅ 2× Bone Blossom + Sugar Apple + Sugarglaze + Banana

    Cooking-Themed Seeds & Plants

    Veinpetal, Twisted Tangle, Taco Fern, Artichoke, Onion, Jalapeño, Crown Melon, Sugarglaze, Tall Asparagus, Grand Tomato
    Canary Melon, Spring Onion, Rhubarb, Bitter Melon, Badlands Pepper, King Cabbage, Potato, Broccoli, Log Pumpkin, Pricklefruit

    Items & Cosmetics

    Gourmet Seed Pack, Gourmet Egg, Culinarian Chest, Exotic Culinarian Chest, Food Crate, Kitchen Crate
    Pet Mutation Shard (Fried, Aromatic), Pancake Stack, Small Bowl, Medium Bowl, Garden Guide, Plant Booster

    Pets

    Mochi Mouse, Bagel Bunny, Pancake Mole, Sushi Bear, Spaghetti Sloth, French Fry Ferret
    Gorilla Chef, Sunny-Side Chicken, Bacon Pig, Hotdog Dachshund, Lobster Thermidor

    Trivia

    • If a player stands in the pot while it is cooking, they spin.
    • Cooking has been confirmed by admins as a permanent game feature.

    © 2025 SargantZafron — Complete Grow a Garden Cooking guide.


  • Instant Hatch Egg Glitch – Bypass Timers in Grow a Garden

    Instant Hatch Egg Glitch – Bypass Timers in Grow a Garden


    Instant Hatch Egg Glitch – Bypass Timers in Grow a Garden


    Instant Hatch Egg Glitch

    Learn how to instantly hatch any egg in Grow a Garden using a two‑plot save slot trick, plus how to pair it with the Koi pet’s refund ability for infinite hatches.

    What Is the Instant Hatch Egg Glitch?

    This glitch lets you bypass the built‑in egg timers by swapping between two save slots. Any egg you place in your second plot will immediately hatch upon loading, no waiting required.

    Step-by‑Step Setup

    1. Prepare Two Plots:
      • Plot A: contains your target egg with its full timer (e.g., 2h 40m for a common egg, 6h for a Zen egg).
      • Plot B: can be empty or your main garden.
    2. Save & Swap:
      • Load into Plot A and note the egg’s timer.
      • Before the “Your garden grew while you were offline” screen appears, swap to Plot B via save slots.
      • Immediately place a fresh egg in Plot B— it will hatch instantly.
    3. Repeat Indefinitely:

      Each time you reload between A & B, any new egg you place will pop out hatched, letting you farm eggs at zero wait.

    Combo with the Koi Pet Refund

    For truly endless hatches, equip the Koi pet (mythic rarity) at level 10+ with the medium toy and golden/rainbow mutation. Its refund chance returns some eggs to your inventory, so you often get your egg back immediately after hatching.

    Warnings & Best Practices

    • Test on secondary accounts to avoid risking your main progress.
    • Avoid excessive swaps—Epic farm sessions may trigger trade bans or data rollback.
    • Use TinyTask for precise, repeatable slot swaps if you plan marathon sessions.
    • Bookmark this page and check back for patches or timing updates.

    Back to Top


  • Nihonzaru Pet Glitch – Overpowered Automation in Grow a Garden

    Nihonzaru Pet Glitch – Overpowered Automation in Grow a Garden


    Nihonzaru Pet Glitch – Overpowered Automation in Grow a Garden


    Nihonzaru Pet Glitch

    Learn how to exploit the Nihonzaru monkey pet glitch in Grow a Garden: step‑by‑step setups for Dilophosaurus, T‑Rex, and Mimic Octopus, and essential warnings.

    What Is the Nihonzaru Pet Glitch?

    The Nihonzaru pet glitch lets you bypass normal cooldowns and spam powerful pet abilities in Grow a Garden. Three pet setups are affected:

    • Dilophosaurus spam
    • T‑Rex cooldown reset
    • Mimic Octopus ability exploit

    1. Dilophosaurus Spam Glitch

    1. Equip exactly one Nihonzaru monkey and one Dilophosaurus in your hotbar.
    2. Place the Dilophosaurus, wait for its “Ready” prompt, then quickly pick it up and redeploy it.
    3. With perfect timing, its roar ability will fire continuously every few seconds.

    This method is tricky to nail but unleashes rapid damage or buffs. If you fail, simply wait for the next game‑day reset to try again.

    2. T‑Rex Cooldown Reset

    1. Place one T‑Rex and one Nihonzaru monkey in your garden.
    2. When the T‑Rex’s 19‑minute countdown nears zero, spam‑deploy your monkey(s) using TinyTask or manual clicks.
    3. Once the countdown hits ready, quickly pick up all monkeys then redeploy them immediately.
    4. The T‑Rex’s roar cooldown will drop to seconds and will hit multiple targets continuously.

    More monkeys = more frequent resets. A single Mimic Octopus can further amplify this effect.

    3. Mimic Octopus Exploit & Caution

    The Mimic Octopus glitch requires:

    • One Nihonzaru monkey in a hotring
    • One Mimic Octopus pet
    • At least 6–8 empty pet slots
    • Treats or toys to boost its passive

    Setup & Trigger:

    1. Place the monkey and Mimic Octopus together, feed it a treat.
    2. Log out completely for 12+ hours (not just switch plots).
    3. Return: the Octopus will now spam its ability in seconds.

    Warning: Excessive use can trigger a “trade ban” or data loss. Use sparingly and only on one pet at a time, or risk account restrictions.

    Warnings & Best Practices

    • Only test on secondary accounts or fresh plots.
    • Avoid mass‑farming to reduce risk of trade bans or data corruption.
    • Always pin a comment with updated timings if patches occur.
    • Use TinyTask for precise, repeatable clicks.

    Back to Top


  • Honeysuckle Sheckle Grinding – Grow a Garden’s Most OP Money Method

    Honeysuckle Sheckle Grinding – Grow a Garden’s Most OP Money Method


    Honeysuckle Sheckle Grinding – Grow a Garden’s Most OP Money Method


    Honeysuckle Sheckle Grinding Method

    Discover how to grow massive Honeysuckles for trillions of Sheckles—calculate size with Magnifying Glass or Diamond‑Studs, use Toucan pets and the sprinkler glitch for max efficiency.

    Why Honeysuckles Are Overpowered

    In Grow a Garden, Honeysuckles can reach absurd sizes—one player’s 1,000 kg blossom sold for 3.2 trillion Sheckles with minimal mutations. This guide shows you:

    • Size‑calculation tricks to spot big ones on the fly
    • Pitfall‑proof methods (Magnifying Glass & Diamond‑Studs)
    • Powers of Toucan pets and the sprinkler glitch

    1. Calculate Size with the Magnifying Glass

    If you have a Magnifying Glass (stock‑notifier recommended), simply click the growing plant to read its weight on screen, then use our Crop Calculator in Weight Mode for an instant Sheckle estimate without harvesting.

    2. Diamond‑Stud Weight Mode

    Honeysuckles display diamond studs at their base—each stud ≈ 55 kg. Count the studs and multiply by 55 to get your plant’s kilogram size on the spot:

    “`text
    # studs × 55 kg = total kg

  • Grow a Garden Amber Mutation – Evolve to Ancient Amber

    Grow a Garden Amber Mutation – Evolve to Ancient Amber


    Grow a Garden Amber Mutation – Evolve to Ancient Amber for 50× Profits


    Amber Mutation in Grow a Garden

    Discover Grow a Garden’s first evolving mutation—Amber evolves to Old Amber and Ancient Amber for massive 10×, 20×, and 50× sell value increases.

    What Is the Amber Mutation?

    Introduced in the Prehistoric update, Amber is the first mutation in Grow a Garden that evolves through stages. Unlike static mutations, Amber progresses from:

    • Amber: 10× base sell value
    • Old Amber: 20× sell value
    • Ancient Amber: 50× sell value

    This makes Ancient Amber one of the highest-value natural mutations (second only to Shocked at 100×).

    How to Obtain Amber Mutation

    1. Crafting: Use Amber Mutation Spray (Cleaning Spray + Dinosaur Egg + Shekels) from the crafting menu.
    2. Pet Proc: Hatch & deploy a Raptor pet (mythic dinosaur). Every few minutes it has a small chance to apply Amber passively.

    Evolving Amber to Ancient Amber

    Amber will only evolve if left on a crop planted in your garden:

    • Amber → Old Amber: ~7 hours of in‑game time
    • Old Amber → Ancient Amber: ~24 hours of in‑game time

    Some reports suggest you must remain logged in for the mutation to progress, while others say simply keeping the plant alive suffices. Test and monitor your crops to confirm.

    Farming Strategies

    • Sprinkler & AFK: Use the sprinkler method to grow large crops, apply Amber early, then AFK for a full day to trigger Ancient Amber.
    • Pet Spread: Use T‑Rex or Octopus pets to spread Amber to nearby crops—speed up your mutation coverage.
    • High‑Value Targets: Prioritize prismatic or transcendent plants (Bone Blossom, Candy Blossom) to maximize your 50× multiplier.

    Integrating Amber into Your Workflow

    — Plant your target crop in a dedicated Zen/Prehistoric plot.
    — Apply Amber asap via spray or Raptor proc.
    — AFK with sprinklers/pets for mutation spread.
    — Harvest once Ancient Amber triggers for a colossal payday.

    Back to Top


  • Grow a Garden Zen Update – Fastest Completion Guide Slug: grow-a-garden-zen-update

    Grow a Garden Zen Update – Fastest Completion Guide Slug: grow-a-garden-zen-update


    Grow a Garden Zen Update – Fastest Completion Guide


    Grow a Garden Zen Update

    Learn the fastest way to complete Grow a Garden’s Zen update—unlock Tranquil plants, upgrade the Zen Tree, farm Chi, and use AFK & T‑Rex spread strategies.

    Introduction

    The Zen update adds a new hourly event—land Tranquil mutations, upgrade your Zen Tree, and farm Chi to unlock powerful shop rewards. In this guide, I’ll show both a simple AFK setup and an advanced pet‑powered strategy for the quickest completion. Plus, we’re giving away seed packs & eggs—comment your username and like to enter!

    1. How the Tranquil Mutation Works

    Every hour, for the first 10 minutes, floating Zen orbs will mutate random plants into Tranquil variants. These Tranquil plants are your key event currency.

    • Event window: 0:00–0:10 past each hour
    • Orb lands → plant turns Tranquil
    • Collect up to ~10 per hour

    2. Upgrading the Zen Tree vs. Farming Chi

    There are two ways to spend your Tranquil plants:

    • Zen Tree (Unk Monk): Contribute plants to grow your personal tree, unlocking new shop paths and upgrades.
    • Chi Panda: Trade in Tranquil for Chi points to purchase event cosmetics, seeds, and more.

    3. Basic AFK Farming Setup

    1. Use a secondary save slot—clear everything except high‑yield prismatic crops (Bean Stock, Sugar Apple).
    2. During each 10‑minute window, stay AFK; collect Tranquil plants when it ends.
    3. Trade into Chi or tree, then repeat hourly.

    This simple loop nets ~80 Chi per hour (10 Tranquil × 8 Chi each) and steadily grows your Zen Tree.

    4. Pro Pet‑Spread Strategy

    Speed up mutation coverage by using spread pets:

    • T‑Rex: Every ~20 min, moves a mutation from one plant to up to 4 nearby.
    • Mimic Octopus: Duplicates the T‑Rex spread effect for even faster coverage.

    Clear out non‑event plots, plant only prismatic crops, then AFK—each pro spread can double or triple your effective mutation count.

    5. Rarity & Save Slots Tips

    • Rarity matters: Prismatic & higher yield more Chi per Tranquil.
    • Save slots: Use a dedicated “Zen plot” save slot for clean, fast reloads.

    Conclusion & Giveaway

    By combining AFK harvesting with pet‑spread mechanics, you can complete the Zen update in just a few hours. If you found this helpful, like and comment your username to win free seed packs & eggs!

    Back to Top