How To Macro In The Background – Full RDP Setup Guide (Roblox)
📖 5 min read
Introduction
Learning how to macro in the background lets you run Roblox automation on a separate Windows session while using your PC normally. This guide covers the complete RDP (Remote Desktop Protocol) setup process.
Open RDPConf.exe and check if all indicators are green
If not green, run install.bat
Note: If you get “Access Denied”, search “Virus & threat protection” in Windows, find RDP Wrap under current threats, click “Allow on device” then “Start actions”.
Fixing “Not Supported” Error
The RDP Wrapper release is outdated, so we need to update the config:
If you’ve been hunting for the perfect Fisch macro, look no further than Bloomfisching. This macro stands out from the crowd thanks to its powerful automation, reliability, and ease-of-use. Bloomfisching is widely regarded as the best Fisch macro available, and in this guide we break down all the features that make it the top choice for both casual and serious players.
🎣 What is a Fisch Macro?
A Fisch macro is a script or tool that automates fishing actions in games — casting, catching, evaluating catches, and more — so that players don’t have to manually click over and over. Instead of constant manual input, the macro does the repetitive work automatically, offering benefits like:
Consistent casting and catching for long grinding sessions
Less fatigue and more efficiency
Better odds for rarer catches (especially with smart features like server hopping)
Freedom to multitask or step away while still progressing
For many players, a high-quality Fisch macro turns tedious grinding into smooth, efficient automation — and that’s exactly where Bloomfisching excels.
📥 Download Bloomfisching
25K+
Downloads
2.0.9
Version
2025
Updated
⚠️
GitHub Repository Unavailable
The original GitHub repository has been taken down. Download directly via MediaFire below.
Bloomfisching is a macro project originally hosted on GitHub by Bloom. According to its description, Bloomfisching is “one of the top fishing macros out there.”
It’s designed to work across all rods (in-game fishing rods), and uses an advanced detection system built by contributors — which helps it stay reliable and functional across different fishing setups.
Importantly, the macro is not just a rudimentary clicker; it aims for smart automation, giving you features beyond simple repeated clicks.
✅ Key Features
🎯
Perfect Cast
Ensures the macro casts the fishing rod with precise timing, maximizing success and reducing wasted casts.
📋
Auto Appraisal
Automatically appraises every catch, so you instantly know whether it’s common, rare, or high-value — no manual appraisal needed.
🔄
Server Hopping
Automatically hops between servers to avoid crowded fishing spots and increase chances of rare catches.
🎣
All Rods Support
Works with any in-game fishing rod, giving flexibility no matter what rod you use.
😴
Automated AFK Farming
Lets you automate fishing for long periods — ideal for AFK-style resource farming without being at your PC.
💻
Open-Source
Because Bloomfisching is open source, its code is transparent and maintained — providing trust and updates.
🎯 Why Bloomfisching Is Better
There are numerous macros and scripts out there for automated fishing, but Bloomfisching stands out for several reasons:
More comprehensive feature set — Many older macros only automate clicks. Bloomfisching handles casting, catching, appraisal, and server switching all in one.
Reliability and precision — Perfect cast and detection systems reduce misfires, lag, or wasted casts.
Flexibility and compatibility — Works with all rods, adapting to different players’ gear and styles.
Transparency and community support — As an open-source project, users can inspect, verify, and contribute to the code.
Ease of setup and use — Bloomfisching is relatively easy to install and start using.
📥 How to Download and Set Up
Setting up Bloomfisching is straightforward:
Download the latest release using the button on this page (via MediaFire direct download)
Extract the downloaded files
Configure your settings (casting, rod selection, server-hop, appraisal, etc.)
Launch the macro and start automated fishing
Best Practices:
Keep the game window unobstructed (to ensure accurate detection and casting)
Join our Discord for updates, support, and the latest releases
Avoid running heavy background apps to minimize lag or interference
🧑💻 Real Use Cases
AFK Farming for Busy Players: If you don’t have time to manually grind fishing for hours, Bloomfisching lets you set things up and step away — giving you progress without constant clicks.
Maximizing Rare Catches: With server hopping + perfect cast, you increase your odds of rare or high-value fish.
Consistent Earnings: Auto-appraisal and automation ensure you don’t miss valuable catches, even while away.
Less Strain, More Comfort: Let automation handle the grunt work, reducing stress and fatigue.
⚠️ Things to Consider
Use responsibly. Automation tools may conflict with some game’s terms of service — always check the rules.
Stay updated. Updates may be needed when the game changes.
Computer performance. For best results, avoid heavy background apps that may interfere with timing.
❓ Frequently Asked Questions
What exactly is a “Fisch macro”?
+
A Fisch macro is a scripted tool that automates fishing actions (casting, catching, appraisal, etc.) in a fishing-based game. It reduces the need for manual input and enables efficient, repetitive fishing with minimal effort.
Why is Bloomfisching considered better than other macros?
+
Bloomfisching offers a suite of advanced features — perfect cast, auto appraisal, server hopping, support for all rods — plus reliability and open-source transparency. That makes it more comprehensive and trustworthy than simpler macros.
Why is the GitHub repository unavailable?
+
The original GitHub repository has been taken down. We’re hosting a direct download mirror via MediaFire so you can still access the latest version (v2.0.9). Join our Discord for updates and support!
Is Bloomfisching safe to use?
+
Bloomfisching was originally open-source and publicly available. The code is transparent and can be audited. Users should still be cautious and use it responsibly.
Does Bloomfisching work with all fishing rods?
+
Yes — one of the macro’s design goals is compatibility with all rods, giving you flexibility no matter your in-game gear.
Can I leave it running for AFK farming?
+
Yes — Bloomfisching supports long-term automated farming. With auto cast + appraisal + server hopping, you can run it and step away, making it ideal for AFK resource or coin farming.
🧠 Final Verdict
If you want a Fisch macro that delivers automation, reliability, flexibility, and trustworthiness — Bloomfisching is hard to beat. Its full feature set (perfect cast, auto appraisal, server hopping, all-rod support) and open-source transparency make it the best option available.
For players who want to optimize their fishing gameplay, save time, and get consistent results — Bloomfisching gives the most value.
Best Roblox Fisch Macro – Complete Automation Suite for Fishing & Treasure Appraisal
Best Roblox Fisch Macro Suite
Complete Fisch Automation – Fishing, Treasure & Auto Appraisal Macros
Download the most comprehensive Roblox Fisch macro suite with automated fishing (20+ rod configs), treasure appraisal grinding, and auto appraisal tools. Complete AutoHotkey installation guide, visual overlay setup, weight multiplier optimization, and rod-specific configurations included.
Required for all macros – Download first before proceeding
🎣 What is the Fisch Macro Suite?
The Best Roblox Fisch Macro Suite is a complete collection of three powerful AutoHotkey automation tools designed specifically for the popular Roblox fishing game “Fisch”. This comprehensive package provides everything needed to automate fishing cycles, optimize treasure appraisal, and maximize weight multipliers.
🎣 Fishing Macro
20+ rod-specific configurations
Auto casting & bite detection
Minigame automation
Shake detection modes
Resolution scaling support
💎 Treasure Appraisal
Visual overlay calibration
Weight multiplier targeting
Money threshold controls
OCR number detection
Fullscreen optimization
⚡ Auto Appraisal
Automated reappraisal cycles
Smart spending management
Multi-fish batch processing
Preset configuration saving
Emergency stop controls
💡 Why Choose This Macro Suite?
This is the most complete Fisch automation package available, combining three essential tools into one comprehensive solution. Each macro is optimized for reliability, includes detailed setup guides, and supports extensive customization for different playstyles and fishing strategies.
🛡️ Safety Guidelines & Important Information
⚠️ Terms of Service Warning
Using automation tools may violate Roblox’s Terms of Service. Use these macros at your own risk. Account penalties can range from warnings to permanent bans. We strongly recommend using an alternate account and avoiding extended continuous sessions.
Best Practices for Safer Macro Usage
✅ Use Alternate Accounts: Never risk your main account with automation
✅ Limit Session Length: Run for 2-4 hours maximum, then take breaks
✅ Stay Present: Monitor the macro while it runs, don’t leave completely AFK
✅ Randomize Patterns: Change locations, rods, and fishing spots regularly
✅ Use Private Servers: Reduces visibility to other players and reports
✅ Add Manual Interaction: Periodically control your character manually
✅ Monitor Game Updates: Pause macro use immediately after Fisch updates
❌ Don’t Brag: Never discuss macro usage in-game or on social media
❌ Avoid Peak Hours: Higher player counts increase detection risk
🎯 Disclaimer
These guides are provided for educational purposes only. The creators and distributors of these macros are not responsible for any consequences resulting from their use. You accept all risks by choosing to use automation tools.
Includes FischV12.ahk + 20+ rod configuration files
📦 What’s Included in the Fishing Macro
FischV12.ahk – Main macro script with GUI interface
20+ Rod Configs – Pre-tuned .ini files for every major rod
Visual Detection System – Computer vision-based automation
Multiple Detection Modes – Click, pixel, and hybrid shake detection
Minigame Automation – Bar tracking and fish position control
Resolution Scaling – Works across different screen sizes
🎯 Key Features
Automated Fishing Cycle
Auto rod casting with configurable duration
Bobber detection and bite recognition
Shake indicator tracking (multiple modes)
Automatic recast after catch completion
Camera control automation
Minigame Intelligence
Real-time bar position tracking
Fish movement prediction
Adaptive control based on rod stats
Arrow direction detection
Edge behavior handling
📥 Fishing Macro Installation
Download AutoHotkey v1.1
Visit https://www.autohotkey.com/ and download AutoHotkey version 1.1 (NOT v2). Run the installer and choose Express Installation.
Download Fishing Macro Package
Click the download button above to get the complete Fisch macro package containing FischV12.ahk and all rod configuration files.
Extract Files
Unzip the downloaded package to an accessible location: C:\Users\YourName\Documents\FischMacro
Launch the Macro
Double-click FischV12.ahk to open the macro GUI. The settings window will appear with three tabs: General Settings, Shake Settings, and Minigame Settings.
Load Rod Configuration
At the bottom of the GUI, find the “Configs list” dropdown. Select your rod (e.g., polaris.ini), then click “Load settings”. This automatically configures all optimal values for your specific rod.
Prepare Your Game
In Roblox Fisch:
Set graphics to Low (or enable “Auto Lower Graphics” in macro)
Zoom camera in fully
Look down at fishing area
Position character near water
Equip your fishing rod
Start Fishing
Click “Save settings” then “Start Macro”. The automation begins immediately.
Hotkeys: Press F1 to pause/resume, F2 to stop completely.
🎣 Available Rod Configurations
The fishing macro includes optimized settings for 20+ different rods. Each configuration is tuned for that rod’s specific Control stat, shake patterns, and minigame behavior.
Rod Name
Config File
Best For
Polaris Rod
polaris.ini
Beginners, stable performance, general grinding
Mythical Rod
myth.ini
High-tier legendary fishing, rare spawns
Tempest Rod
tempest.ini
Fast casting, aggressive fishing style
Seraphic Rod
sera.ini
Requires special “Sera” checkbox enabled
Volcanic Rod
volcanic.ini
High damage output, exotic locations
Abyssal Rod
abyssal.ini
Deep sea fishing, dark environments
Rod of the Depths
rotd.ini
Advanced players, trench fishing
Heaven’s Rod
heaven.ini
Event-exclusive rod optimization
No Life Rod
nlr.ini
Maximum efficiency grinding, 24/7 farming
Steady Rod
steady.ini
Consistent catches, stable control
📁 Additional Configurations
The package also includes configs for: Arc Rod, Bric-a-Brac Rod, Depthseeker, Ethereal, Fang, King’s Rod, Rotek, Summit, and more. Browse the /Other Rods/ folder for the complete list.
⚙️ Advanced Configuration Guide
General Settings
Setting
Default
Purpose
Auto Lower Graphics
Enabled
Automatically minimizes Roblox graphics for better detection
Auto Zoom In
Enabled
Zooms camera in for optimal detection view
Auto Look Down
Enabled
Angles camera downward to face fishing area
Restart Delay
1500ms
Wait time before starting new fishing cycle
Hold Rod Cast Duration
600ms
How long to hold mouse when casting (increase for lag)
Wait for Bobber
1000ms
Delay after cast before bite detection starts
Shake Settings
Setting
Default
Purpose
Shake Mode
Click
Detection method for bite indication (Click recommended)
Shake Failsafe
20 seconds
If no bite detected, restart fishing cycle
Click Shake Color Tolerance
3
RGB variance for shake detection (lower = stricter)
Click Scan Delay
10ms
Time between shake detection scans
Minigame Settings
⚠️ Critical: Control Value
This MUST match your rod’s Control stat! Check your rod in-game and enter the exact Control value (e.g., 0.15, 0.20, 0.25). Incorrect values cause minigame failures.
Setting
Purpose
Control Value
Your rod’s Control stat from in-game stats
Fish Bar Tolerance
Color detection variance for fish position (5 recommended)
White Bar Tolerance
Detection variance for tracking bar (15 recommended)
Arrow Tolerance
Direction indicator sensitivity (6 recommended)
Scan Delay
Milliseconds between minigame frame scans (10ms default)
Side Bar Ratio
Edge detection threshold (0.7 for most rods)
Side Bar Delay
Pause at bar edges to prevent overshooting (400ms)
💡 Fishing Macro Pro Tips
🎯 Start with Polaris: Most stable config for first-time users
⚙️ Adjust for Your PC: Slower computers need higher delays
🌊 Clear Fishing Spots: Choose locations with unobstructed water
🎮 Use Windowed Mode: Easier to monitor and adjust settings
📊 Track Results: Log fish caught per hour to optimize settings
Created by lolzzn | Includes visual overlay setup & threshold controls
📦 What is Treasure Appraisal Macro?
The Treasure Appraisal Macro automates the treasure appraisal process to achieve optimal weight multipliers (KG multipliers) without manual clicking. Created by lolzzn, this tool uses visual overlay positioning and OCR number reading to repeatedly appraise fish until reaching your target weight or money limit.
✨ Key Features
Smart Automation
Visual overlay positioning system
OCR-based number detection
Intelligent reappraisal logic
Auto-detects appraisal slots
Real-time weight tracking
Customizable Controls
Money threshold limits
Weight multiplier targets
Adjustable click delays
Preset save/load system
Individual step retake
📥 Treasure Appraisal Installation
Ensure AutoHotkey v1.1 is Installed
If you haven’t already, download and install AutoHotkey v1.1 from https://www.autohotkey.com/
Download Treasure Appraisal Macro
Click the download button above to get the treasure appraisal macro package.
Extract Files
Unzip to an accessible location: C:\Users\YourName\Documents\FischAppraisal
Launch Roblox in Fullscreen
⚠️ Critical Requirement
This macro MUST be used in fullscreen mode. Windowed mode will not work due to coordinate detection. Press F11 in Roblox or use settings to enable fullscreen.
Run the Macro Script
Double-click the extracted .ahk file to launch. The 4-step visual calibration wizard begins automatically.
⚙️ 4-Step Visual Overlay Setup
The macro requires positioning colored detection boxes over specific UI elements. Use R to confirm each step.
Step 1: First Fish Slot (Green Box)
A green resizable box appears. Move and resize it to completely cover the first fish slot (top-left appraisal position). Press R to confirm.
Step 2: Second Fish Slot (Green Box)
Another green box appears. Position it over the second row, middle fish slot. Ensure it covers the entire appraisal area. Press R to confirm.
Step 3: Weight Number Zone (Yellow Box)
A yellow box appears for OCR number detection.
CRITICAL: Position this box to ONLY cover the multiplier numbers (e.g., “1.5”, “2.0”). Do NOT include the “KG” letters or “E” from “APPRAISE”. The box must be tight around just the numbers. Press R to confirm.
⚠️ Precision Required
Including letters breaks OCR detection. Only numbers should be in the yellow box.
Step 4: Reappraise Button (Green Box)
The final green box for the reappraise button.
Important: You must manually fail an appraisal first to reveal the reappraise button. Then position the green box over it and press R to complete setup.
✅ Calibration Complete!
Visual overlays are configured. You can now adjust threshold settings and start automation.
🔄 Retaking Individual Steps
The macro includes buttons to recalibrate specific steps without redoing everything:
Retake All: Restart entire 4-step process
Retake Step 1: Reposition first fish slot only
Retake Step 2: Reposition second fish slot only
Retake Step 3: Reposition weight number zone only
Retake Step 4: Reposition reappraise button only
🎛️ Threshold Configuration
After visual setup, configure these three settings to control automation behavior:
Setting
Purpose
Recommended Values
Delay (ms)
Time between each click/action
100-300ms (adjust for PC speed)
Money Threshold
Maximum money to spend before stopping
Set based on budget (e.g., 5000-10000)
Weight Threshold
Target weight multiplier to achieve
1.5 (50%), 2.0 (2x), 2.5 (2.5x), 3.0 (3x)
⚙️ Delay Setting
100-150ms: Fast (high-end PC, good connection)
200-250ms: Moderate (recommended for most)
300-400ms: Slow (older PC, laggy connection)
💰 Money Threshold
Sets spending limit. Macro stops when this amount is spent on appraisals. Prevents accidental bankruptcy. Recommended: Set to 20-30% of total money.
⚖️ Weight Threshold
Target weight multiplier. Macro stops when reached or exceeded.
1.5: 50% weight increase
2.0: 2x weight multiplier
2.5: 2.5x weight multiplier
3.0: 3x weight multiplier
⌨️ Control Hotkeys
F1Exit Macro
F2Reload Script
Ctrl + QStart Normal Mode
AltForce Stop
Ctrl + RStart Preset Mode
RConfirm Setup Step
💡 Treasure Appraisal Pro Tips
🎯 Test on Common Fish First: Verify settings before using on legendaries
Complete automation with smart spending management
📦 What is Auto Appraisal Macro?
The Auto Appraisal Macro is an advanced automation tool that handles the complete appraisal workflow with minimal manual intervention. This macro features intelligent spending management, multi-fish batch processing, and preset configuration systems for efficient weight multiplier grinding.
Download Auto Appraisal Macro
Click the download button above to get the auto appraisal package.
Extract Files
Unzip to your preferred location: C:\Users\YourName\Documents\FischAutoAppraisal
Run the Macro
Double-click the .ahk file to launch the auto appraisal system. The configuration interface will appear.
⚙️ Configuration Settings
Setting
Purpose
Recommended Values
Batch Size
Number of fish to process per cycle
1-5 (based on inventory)
Weight Target
Desired weight multiplier
1.5x, 2.0x, 2.5x, 3.0x
Max Spend per Fish
Money limit for each fish
1000-5000 (based on budget)
Total Budget
Overall spending limit
10000-50000 (based on wealth)
Action Delay
Time between macro actions
150-300ms
Retry Limit
Max attempts per fish
5-10 attempts
🎮 Operation Modes
Normal Mode
Processes fish one at a time with standard settings. Best for careful appraisal of valuable catches.
Sequential fish processing
Individual weight targeting
Detailed status updates
Manual intervention possible
Batch Mode
Processes multiple fish simultaneously with identical settings. Ideal for bulk appraisal of common catches.
Multi-fish automation
Uniform weight targets
Faster processing
Shared budget allocation
Preset Mode
Uses saved configuration profiles for quick setup. Perfect for repeated appraisal sessions.
Save custom configurations
Load previous settings
Quick start capability
Multiple preset slots
⌨️ Control Hotkeys
F1Start/Stop Automation
F2Pause/Resume
F3Skip Current Fish
F4Emergency Stop
Ctrl + SSave Preset
Ctrl + LLoad Preset
🔄 Complete Workflow
Prepare Fish Inventory
Catch fish and navigate to appraisal menu with your catches ready for processing.
Configure Settings
Set batch size, weight targets, spending limits, and timing delays based on your goals.
Select Operation Mode
Choose Normal, Batch, or Preset mode depending on your appraisal needs.
Start Automation
Press F1 to begin. Monitor progress and adjust as needed using control hotkeys.
Monitor Progress
Watch real-time status updates showing current fish, weight achieved, money spent, and remaining budget.
Completion
Automation stops when all fish reach target weight, budget is exhausted, or manual stop is triggered.
💡 Auto Appraisal Pro Tips
💰 Budget Wisely: Allocate more to rare fish, less to common catches
🎯 Use Batch Mode: For processing multiple common fish efficiently
💾 Save Presets: Create profiles for different fish types or budgets
⏱️ Adjust Delays: Higher delays for stability, lower for speed
📊 Monitor Spending: Track ROI to optimize threshold settings
🛡️ Emergency Stop Ready: Keep F4 accessible for quick stops
🔄 Skip Low-Value: Use F3 to skip fish not worth continuing
❓ Frequently Asked Questions
Q: What is the best Roblox Fisch macro?
This complete suite is considered the best because it includes three essential tools: fishing automation with 20+ rod configs, treasure appraisal with visual overlay calibration, and auto appraisal with smart spending management. Each macro is optimized for reliability and includes comprehensive setup guides.
Q: Do I need AutoHotkey v2 for these macros?
No! All three macros require AutoHotkey v1.1, NOT v2. The syntax and functions differ between versions. Download v1.1 from https://www.autohotkey.com/
Q: Which macro should I download first?
Start with the Fishing Macro if you want to automate catching fish. Use Treasure Appraisal or Auto Appraisal macros when you have fish to appraise for better weight multipliers. You can download and use all three macros together.
Q: Can I run multiple macros simultaneously?
No. AutoHotkey macros run one at a time. You should use the fishing macro to catch fish, then stop it and use appraisal macros to process your catches. Attempting to run multiple AHK scripts simultaneously can cause conflicts.
Q: What’s the difference between Treasure Appraisal and Auto Appraisal?
Treasure Appraisal: Manual setup with visual overlays, processes one fish at a time with precise control. Auto Appraisal: More automated workflow, batch processing capability, preset system for repeated use. Choose based on whether you prefer precision control or convenience.
Q: Which rod configuration should I use?
For beginners: Polaris Rod (stable, forgiving)
For efficiency: No Life Rod (fastest grinding)
For legendaries: Mythical Rod or Rod of the Depths
Load the corresponding .ini file in the macro GUI.
Q: How do I know if my macro is working correctly?
For the fishing macro, watch the first few cycles to ensure proper casting, bite detection, and minigame completion. For appraisal macros, monitor the first few appraisals to verify visual overlays are correctly positioned and numbers are being read accurately.
Q: Can these macros work on mobile or console?
No. AutoHotkey is Windows-only, and these macros are designed for PC Roblox. Mobile devices and consoles don’t support AHK scripts, and there are no equivalent automation tools for those platforms.
Q: What happens if Fisch updates?
Major game updates may change fishing mechanics, UI elements, or detection colors, potentially breaking macros. After Fisch updates, stop using macros immediately and wait for the community to release updated versions. Check Discord servers for update notifications.
Q: Are there any alternatives to using macros?
Yes – manual play is the safest option with zero ban risk and full compliance with Roblox TOS. Manual fishing also provides genuine satisfaction and skill improvement. Macros are a trade-off between convenience and risk.
Q: Can I create custom configurations?
Yes! For the fishing macro, copy an existing .ini file, rename it, and adjust values based on your rod’s stats. For appraisal macros, save custom presets with your preferred threshold settings. Refer to advanced configuration guides for detailed parameter explanations.
Q: What should I do if I get banned?
Accept the consequences – automation violates Roblox TOS. This is why we strongly recommend using alternate accounts. If banned, you can appeal through Roblox support, but success is unlikely for automation violations. Learn from the experience and consider manual play going forward.
Created by lolzzn | Includes visual overlay setup & threshold controls
💎 What is the Fisch Treasure Appraisal Macro?
The Fisch Treasure Appraisal Macro is an AutoHotkey script designed to automate the treasure appraisal process in Roblox Fisch. This powerful tool repeatedly appraises your caught fish to achieve optimal weight multipliers (KG multipliers) without manual clicking.
🎯 Smart Automation
Auto-detects appraisal slots
Visual overlay positioning
OCR number reading
Intelligent reappraisal logic
⚙️ Customizable Controls
Money threshold limits
Weight multiplier targets
Adjustable click delays
Preset save/load system
🎮 Easy Setup
4-step visual calibration
Resizable detection zones
Individual step retake
Fullscreen optimized
💡 How It Works
The macro uses visual overlays (green and yellow boxes) to identify fish slots, appraisal buttons, and weight numbers on screen. It continuously reappraises until reaching your target weight multiplier or money limit.
✨ Created by lolzzn
This macro was developed by lolzzn specifically for efficient treasure appraisal grinding in Fisch. Full credit goes to the creator for this automation tool.
Consistent Results: Never miss an appraisal opportunity
🎯 Perfect For
Legendary Fish: Maximizing rare catch values
Trophy Grinding: Achieving weight milestones
Money Making: Optimizing fish sale profits
Bulk Appraisals: Processing multiple catches
Efficiency Players: Min-maxing game mechanics
🛡️ Safety and Usage Guidelines
⚠️ Important Notice
Using automation tools may be against Roblox’s Terms of Service. Use this macro at your own risk. We recommend using an alternate account and avoiding extended sessions.
Smart Usage Tips
✅ Set Realistic Money Limits: Don’t spend all your in-game currency
✅ Use During Off-Peak: Less player traffic = lower detection risk
✅ Monitor the Process: Stay at your computer while macro runs
✅ Take Breaks: Don’t run continuously for hours
✅ Test on Common Fish First: Verify settings before rare appraisals
Download AutoHotkey v1.1
Visit the official AutoHotkey website and download version 1.1 (NOT v2). 👉 Download AutoHotkey v1.1 Required for the macro to function
Install AutoHotkey
Run the downloaded installer and select Express Installation. After installation, you’ll be able to run .ahk script files.
Download Treasure Appraisal Macro
Download the macro created by lolzzn:
Extract Files
Extract the downloaded .zip file to an accessible location: C:\Users\YourName\Documents\FischAppraisal
Launch Roblox in Fullscreen
⚠️ Critical Requirement
The macro MUST be used in fullscreen mode. Windowed mode will not work correctly due to coordinate detection.
Open Roblox Fisch and press F11 or use Roblox settings to enable fullscreen mode.
Run the Macro Script
Double-click the extracted .ahk file to launch the treasure appraisal macro. The setup wizard will begin automatically.
✅ Ready for Setup
With AutoHotkey installed and Roblox in fullscreen, you’re ready to configure the visual overlays. Continue to the setup guide below.
⚙️ Visual Overlay Setup Guide
The macro requires a 4-step calibration process where you position colored boxes over specific UI elements. Each step uses R to confirm and continue.
📐 Setup Overview
You’ll position 4 detection zones: 2 green boxes for fish slots, 1 yellow box for weight numbers, and 1 final green box for the reappraise button.
Step-by-Step Calibration
Step 1: First Fish Slot (Green Box)
When the macro launches, a green resizable box will appear.
Action Required:
Move and resize the green box to cover the first fish slot (top-left position)
The box should completely contain the first appraisal slot
Press R to confirm and continue
Step 2: Second Fish Slot (Green Box)
A second green box appears after confirming step 1.
Action Required:
Position this box over the second row, middle fish slot
Ensure the box covers the entire appraisal area
Press R to confirm and continue
Step 3: Weight Number Zone (Yellow Box)
A yellow box appears for number detection.
Action Required:
Move and resize the yellow box to ONLY cover the numbers in the current KG multiplier display
Critical: Do NOT include the “KG” letters or the “E” from “APPRAISE”
The box should be tight around just the multiplier numbers (e.g., “1.5”, “2.0”)
Press R to confirm and continue
⚠️ Precision Required
The yellow box must ONLY contain numbers. Including letters will break the OCR detection and cause failures.
Step 4: Reappraise Button (Green Box)
The final green box for the reappraise button.
Important: You must fail an appraisal first to make the reappraise button visible.
Action Required:
Manually appraise a fish and intentionally fail to reveal the “Reappraise” button
Position the green box over the entire reappraise button
Press R to complete setup
✅ Calibration Complete!
After completing all 4 steps, your visual overlays are configured. You can now adjust threshold settings and start the automation.
🔄 Retaking Individual Steps
If you need to recalibrate any specific step, the macro includes individual retake buttons:
Retake All: Start the entire 4-step process over
Retake Step 1: Reposition first fish slot only
Retake Step 2: Reposition second fish slot only
Retake Step 3: Reposition weight number zone only
Retake Step 4: Reposition reappraise button only
🎛️ Threshold Settings Configuration
After completing visual setup, configure these three critical settings to control the automation behavior:
Setting
Purpose
Recommended Values
Delay (ms)
Time between each click/action
100-300ms (adjust for PC speed)
Money Threshold
Maximum money to spend before stopping
Set based on your budget (e.g., 10000)
Weight Threshold
Target weight multiplier to achieve
1.5 (50% increase), 2.0 (2x), 2.5 (2.5x), etc.
⚙️ Delay Setting
The Delay controls how fast the macro clicks between actions. Lower values = faster automation, but may cause detection or errors.
100-150ms: Fast (high-end PC, good connection)
200-250ms: Moderate (recommended for most users)
300-400ms: Slow (older PC, laggy connection)
💰 Money Threshold
The Money Threshold sets a spending limit. Once you’ve spent this much money on appraisals, the macro stops automatically.
Enter the maximum amount of in-game currency you’re willing to spend
Prevents accidental bankruptcy from over-appraising
Recommended: Set to 20-30% of your total money
⚖️ Weight Threshold
The Weight Threshold defines your target weight multiplier. The macro stops when this value is reached or exceeded.
1.5: 50% weight increase (1.5x multiplier)
2.0: 2x weight multiplier (double original weight)
2.5: 2.5x weight multiplier
3.0: 3x weight multiplier (triple original weight)
💡 Example Configuration
For a balanced setup: Delay = 200ms, Money Threshold = 5000, Weight Threshold = 2.0
This will reappraise until reaching 2x weight or spending 5000 money, whichever comes first.
⌨️ Macro Control Hotkeys
Once configured, use these keyboard shortcuts to control the treasure appraisal automation:
F1Exit Macro
F2Reload Script
Ctrl + QStart Normal Mode
AltForce Stop
Ctrl + RStart Preset Mode
RConfirm Setup Step
🎮 Hotkey Descriptions
Hotkey
Function
When to Use
F1
Exit Macro
Completely close the macro application
F2
Reload Script
Restart the macro (keeps settings)
Ctrl + Q
Start Normal Mode
Begin automated appraisal with current settings
Alt
Force Stop
Emergency stop during automation
Ctrl + R
Start Preset Mode
Use saved preset configuration
R
Confirm Step
During setup to confirm each visual overlay
🔄 Complete Usage Workflow
Follow this workflow for successful treasure appraisal automation:
Prepare Your Fish
Catch fish in Roblox Fisch and navigate to the appraisal menu with your treasure ready.
Launch Macro in Fullscreen
Ensure Roblox is in fullscreen mode (F11), then run the AutoHotkey script.
Complete 4-Step Visual Setup
Position all 4 detection boxes (2 fish slots, weight numbers, reappraise button) using R to confirm each.
Configure Thresholds
Set your Delay, Money Threshold, and Weight Threshold based on your goals and budget.
Start Automation
Press Ctrl + Q to begin normal mode. The macro will start appraising automatically.
Monitor Progress
Watch as the macro reappraises your fish. It will stop when reaching your weight target or money limit.
Stop if Needed
Press Alt for emergency stop or F1 to exit completely.
✅ Automation Complete
Once the macro reaches your weight threshold or money limit, it stops automatically. Your fish is now optimally appraised!
❓ Frequently Asked Questions
Q: What is treasure appraisal in Fisch?
Treasure appraisal is a mechanic in Roblox Fisch where you can pay in-game currency to reappraise caught fish for better weight multipliers (KG multipliers). Higher multipliers increase the fish’s value when sold.
The macro uses coordinate-based detection that relies on consistent screen positioning. Fullscreen mode ensures the UI elements are always in the same location for accurate overlay placement.
Q: What happens if I run out of money before reaching weight threshold?
The macro will stop automatically when you hit your Money Threshold limit, even if the target weight hasn’t been reached. This prevents overspending.
Q: Can I save my setup for future use?
Yes! After completing the 4-step calibration, your visual overlays are saved. You can use Ctrl + R to start with your saved preset without recalibrating each time.
Q: What if my yellow box includes letters?
If the yellow box (step 3) includes the “KG” letters or any part of “APPRAISE”, the OCR will fail to read numbers correctly. You MUST resize it to only contain the numerical multiplier value.
Q: How do I know what weight threshold to set?
Common targets:
• 1.5 = 50% increase (budget-friendly)
• 2.0 = 2x multiplier (balanced)
• 2.5-3.0 = High multiplier (expensive)
Set based on your money and desired fish value.
Q: Can this work on mobile?
No. AutoHotkey is Windows-only, and this macro requires fullscreen desktop Roblox. Mobile devices are not supported.
Q: Who created this macro?
This treasure appraisal macro was created by lolzzn. Full credit to the developer for this automation tool.
Q: What’s the difference between Normal Mode and Preset Mode?
Normal Mode (Ctrl + Q): Uses your current threshold settings Preset Mode (Ctrl + R): Loads previously saved threshold configuration
💡 Pro Tips for Optimal Results
🎯 Test on Common Fish First: Calibrate and test your settings on low-value fish before using on rare legendaries
💰 Start Conservative: Set a low money threshold initially (1000-2000) to verify the macro works correctly
📐 Precise Yellow Box: Take extra time on step 3 to ensure the yellow box ONLY covers numbers – this is the most critical step
⏱️ Adjust Delay for Your PC: Slower computers need 250-300ms delay, fast PCs can use 100-150ms
🔄 Use Retake Buttons: If one zone isn’t detecting properly, use individual retake instead of redoing all 4 steps
📊 Track Your ROI: Monitor how much money you spend vs. the value increase to optimize your threshold settings
🛡️ Stay Present: Don’t leave the macro running unattended – monitor it for errors or detection issues
🎮 Keep Fullscreen: Accidentally exiting fullscreen will break detection – avoid Alt+Tab or clicking outside Roblox
💎 Prioritize Rare Fish: Save your money for appraising legendary/mythical catches where multipliers matter most
📱 Emergency Stop Ready: Keep your hand near Alt for quick force-stop if something goes wrong
🎉 Ready to Automate Treasure Appraisal?
Download the macro, complete the 4-step setup, and start grinding optimal weight multipliers efficiently!
Download the best Fisch macro for Roblox with our comprehensive installation guide. Includes AutoHotkey setup, rod-specific configuration files for 20+ rods (Polaris, Mythical, Tempest, Seraphic & more), safety tips to avoid detection, and troubleshooting help.
✅ Free Download🎣 20+ Rod Configs⚡ AutoHotkey V1.1🛡️ Safety Guide
🎯 Quick Download – Get Started in 5 Minutes
Everything you need to automate Fisch fishing in Roblox
Includes all rod configs + detailed setup instructions
🎣 What is a Fisch Macro?
A Fisch macro is an automated script designed for the popular Roblox fishing game “Fisch”. Using AutoHotkey (AHK), this macro automates repetitive fishing tasks, including:
🎯 Auto Fishing
Automatic rod casting
Bobber detection
Perfect timing on bites
Recast automation
🎮 Minigame Automation
Bar tracking system
Adaptive control logic
Arrow direction detection
Dynamic response timing
⚙️ Advanced Features
20+ rod configurations
Resolution scaling
Customizable delays
Shake detection modes
💡 How It Works
The Fisch macro uses computer vision techniques to detect on-screen elements (fishing bar, fish position, shake indicators) and automatically performs mouse clicks and timing-based actions to complete fishing cycles without manual input.
🚀 Why Players Use Fisch Macros
✅ Benefits
Time Efficiency: Farm resources 24/7 while AFK
Consistency: Perfect minigame performance every time
Level Progression: Faster XP and currency gains
Rare Fish: Increased chances at legendary catches
Reduced Fatigue: No more repetitive clicking
⚠️ Important Considerations
Detection Risk: Roblox anti-cheat may flag suspicious activity
Account Safety: Potential for temporary or permanent bans
Fair Play: Gives unfair advantage over manual players
Game Updates: Macros may break after Fisch updates
System Resources: Runs in background using CPU
🛡️ Is Using a Fisch Macro Safe?
⚠️ Official Policy
Roblox’s Terms of Service prohibit third-party automation tools. Using macros violates these terms and can result in account penalties ranging from warnings to permanent bans.
How to Minimize Detection Risk
✅ Don’t Run 24/7: Take regular breaks to simulate human behavior
✅ Randomize Timing: Add slight delays and variations to macro actions
✅ Stay at Your PC: Periodically interact manually with the game
✅ Use Private Servers: Reduces visibility to other players
✅ Avoid Obvious Patterns: Don’t fish in exact same spot repeatedly
✅ Monitor Game Updates: Pause macro use after major Fisch updates
❌ Never Use on Main Account: Consider using an alternate account
❌ Don’t Brag: Avoid discussing macro use in-game or on social media
🎯 Smart Usage Tips
Experienced macro users recommend running sessions of 2-4 hours maximum, followed by manual play. They also suggest varying fishing locations and using different rods to appear more “human-like” to detection systems.
📥 Step-by-Step Installation Guide
Download AutoHotkey v1.1
Visit the official AutoHotkey website and download version 1.1 (NOT v2, as this macro requires v1.1 syntax). 👉 Download AutoHotkey v1.1 Official link: https://www.autohotkey.com/
Install AutoHotkey
Run the downloaded installer and choose Express Installation. This will install AHK with all necessary components. After installation completes, you’ll be able to run .ahk script files by double-clicking them.
Download Fisch Macro Files
Download the complete Fisch macro package which includes:
• FischV12.ahk (main script file)
• 20+ rod configuration files (.ini format)
• Setup instructions
Download Complete Package
Includes all configs for: Polaris, Mythical, Tempest, Seraphic, Volcanic, Abyssal, and 14 more rods
Extract Files
Extract the downloaded .zip file to an easily accessible location, such as: C:\Users\YourName\Documents\FischMacro
Keep all files in the same folder to ensure the macro can find the configuration files.
Choose Your Rod Configuration
The macro includes optimized settings for different rods. Browse the /Other Rods/ folder and find your rod’s .ini file. If you use Polaris Rod, there’s a dedicated folder with optimized settings.
Launch the Macro
Double-click FischV12.ahk to open the macro GUI. A settings window will appear with three tabs:
General Settings: Camera controls, delays, casting duration
Shake Settings: Detection sensitivity and timing
Minigame Settings: Bar tracking, control values, tolerance levels
Configure for Your Rod
In the macro GUI, at the bottom of the window, you’ll see a dropdown menu labeled “Configs list”. Select your rod’s configuration file (e.g., polaris.ini), then click “Load settings”. This will automatically populate all fields with optimized values for your specific rod.
Pre-Game Setup
Before starting the macro, prepare your Roblox Fisch game:
Look down at the fishing area (hold right-click and move mouse)
Position your character near water
Equip your fishing rod
💡 Pro Tip: The macro includes “Auto Lower Graphics” and “Auto Look Down” options. Enable these in the General Settings tab for automatic setup.
Start Fishing!
With Roblox Fisch active and your character ready:
Click “Save settings” in the macro GUI
Click “Start Macro”
The macro will begin automated fishing
Monitor the first few cycles to ensure it’s working correctly
Hotkeys:
• Press F1 to pause/resume the macro
• Press F2 to stop the macro completely
✅ Installation Complete!
Your Fisch macro is now running. You should see the macro automatically casting your rod, detecting bites, and completing minigames. If you encounter issues, check the troubleshooting section below.
🎣 Available Rod Configurations
The Fisch macro package includes pre-configured settings for 20+ different rods. Each configuration is optimized for that rod’s specific control stat, shake patterns, and minigame behavior.
Rod Name
Config File
Recommended For
Polaris Rod
polaris.ini
Best for beginners, stable performance
Mythical Rod
myth.ini
High-tier legendary farming
Tempest Rod
tempest.ini
Fast casting, aggressive fishing
Seraphic Rod
sera.ini
Requires special “Sera” checkbox enabled
Volcanic Rod
volcanic.ini
High damage, exotic locations
Abyssal Rod
abyssal.ini
Deep sea fishing
Rod of the Depths
rotd.ini
Advanced players, trench fishing
Heaven’s Rod
heaven.ini
Event-exclusive rod
No Life Rod
nlr.ini
Extreme grinding, max efficiency
Steady Rod
steady.ini
Stable control, consistent catches
📁 More Configurations Available
The download package includes additional configs for: Arc Rod, Bric-a-Brac Rod, Depthseeker, Ethereal, Fang, King’s Rod, Rotek, Summit, and more. Simply load the .ini file matching your rod!
🎯 How to Switch Rod Configs
Open the Fisch macro GUI
Find the “Configs list” dropdown at the bottom
Select your rod’s configuration (e.g., “polaris” for Polaris Rod)
Click “Load settings” to apply the configuration
Click “Save settings” to make it your default
Click “Start Macro” to begin fishing
⚙️ Advanced Configuration Guide
For experienced users who want to fine-tune their macro performance or create custom configurations for unlisted rods.
General Settings Explained
Setting
Default
Description
Auto Lower Graphics
Enabled
Automatically sets Roblox graphics to minimum for better detection
Auto Zoom In
Enabled
Zooms camera in for optimal detection view
Auto Look Down
Enabled
Angles camera downward to face fishing area
Restart Delay
1500ms
Wait time before restarting fishing cycle after completion
Hold Rod Cast Duration
600ms
How long to hold mouse button when casting (increase for high ping)
Wait for Bobber
1000ms
Delay after cast before starting bite detection
Bait Delay
300ms
Pause duration when applying bait
Shake Settings Explained
Setting
Default
Description
Shake Mode
Click
Detection method for bite indication (Click mode recommended)
Shake Failsafe
20 seconds
If no bite detected within this time, restart fishing cycle
Click Shake Color Tolerance
3
RGB variance allowed when detecting shake indicator (lower = stricter)
Click Scan Delay
10ms
Time between shake detection scans (lower = more responsive)
Minigame Settings Explained
⚠️ Critical Setting: Control Value
This MUST match your rod’s Control stat! Check your rod’s stats in Fisch and enter the exact Control value (e.g., 0.15, 0.20, 0.25). Incorrect values will cause minigame failures.
Setting
Description
Control Value
Your rod’s Control stat (check in-game!)
Fish Bar Tolerance
Color detection variance for fish position (5 recommended)
White Bar Tolerance
Detection variance for target tracking bar (15 recommended)
Arrow Tolerance
Direction indicator detection sensitivity (6 recommended)
Scan Delay
Milliseconds between minigame frame scans (10ms default)
Side Bar Ratio
Threshold for edge detection logic (0.7 works for most rods)
Side Bar Delay
Pause when fish reaches bar edges (400ms prevents overshooting)
📖 Complete Minigame Settings Guide
For detailed explanations of Stable/Unstable Multipliers and Division values, check out the official guide: Minigame Settings Google Doc
❓ Frequently Asked Questions
Q: What is a macro?
A macro is an automated script that performs repetitive actions on your computer. In Roblox Fisch, the macro automates fishing by detecting visual elements on screen and performing timed mouse clicks to cast rods, detect bites, and complete minigames.
Q: Do I need AutoHotkey v2 to run this macro?
No! This Fisch macro requires AutoHotkey v1.1, NOT v2. The syntax and functions are different between versions. Download v1.1 from the official AutoHotkey website: https://www.autohotkey.com/
Q: How do I start and stop the macro?
After launching FischV12.ahk and clicking “Start Macro”, the automation begins. Use these hotkeys:
• F1 – Pause/Resume the macro
• F2 – Stop the macro completely
You can also close the macro GUI window to stop it.
Q: Can Fisch macros work on mobile?
No. AutoHotkey is a Windows-only automation tool, and Roblox Fisch macros only work on PC. Mobile devices don’t support AHK scripts, and there’s no equivalent macro tool for mobile Roblox.
Q: Which rod should I use with the macro?
The macro works with all rods, but some are better than others:
• Best for beginners: Polaris Rod (stable, forgiving)
• Best for efficiency: No Life Rod (fastest grinding)
• Best for legendaries: Mythical Rod or Rod of the Depths
Just make sure to load the correct .ini configuration for whichever rod you choose!
Q: Where do I get the macro file?
Download links are provided at the top of this guide. The download package includes:
• FischV12.ahk (main script)
• 20+ rod-specific .ini configuration files
• Setup instructions and troubleshooting tips
Q: Does the macro use my items or bait automatically?
The macro can be configured to handle bait application with the “Bait Delay” setting. However, inventory management (selecting bait, using rods, etc.) still requires manual input. The macro focuses on automating the casting and minigame mechanics.
Q: Can I create my own rod configuration?
Yes! Advanced users can create custom .ini files by:
1. Copying an existing .ini file (like default.ini)
2. Renaming it to your rod’s name
3. Adjusting values based on your rod’s stats
4. Saving it in the same folder as FischV12.ahk
Refer to the Minigame Settings Guide (linked in the macro GUI) for detailed parameter explanations.
Q: Will this macro work after Fisch updates?
Possibly not. Major game updates may change fishing mechanics, UI elements, or detection colors, which can break the macro. After Fisch updates, wait for the macro community to release updated versions. Join the Discord (link above) for update notifications.
💡 Pro Tips for Optimal Macro Performance
🎯 Start with Polaris configuration: It’s the most stable and forgiving for first-time macro users. Once you understand how it works, experiment with other rods.
⚙️ Fine-tune for your PC: If you have a slower computer, increase scan delays slightly. High-end PCs can reduce delays for faster response times.
🌊 Fish in optimal locations: Choose fishing spots with clear, unobstructed water views. Avoid areas with lots of NPCs or visual clutter.
🎮 Use windowed mode: Run Roblox in windowed mode rather than fullscreen. This makes it easier to monitor the macro and reduces detection risk.
🔋 Monitor resource usage: Keep Task Manager open to check if Roblox or AutoHotkey are using excessive CPU. High CPU usage can indicate issues.
📊 Track your results: Note which configurations work best for your setup. Keep a log of fish caught per hour with different settings.
🛡️ Use a VPN (optional): Some users report better results using VPNs to mask their IP during extended macro sessions, though this is debated.
⏰ Run during off-peak hours: Fewer players online means less scrutiny and better server performance.
🔄 Periodically change fishing spots: Don’t fish in the exact same location for hours. Move to different areas of the map every 1-2 hours.
📱 Stay present: Even if the macro is running, stay at your computer and occasionally interact manually. This makes your activity appear more natural.
🎣 Alternatives to Fisch Macros
Manual Play vs. Automated Play
While macros offer convenience, many players enjoy the satisfaction of manual fishing. Manual play has its own advantages:
✅ Manual Fishing Benefits
No risk of bans or account penalties
Full compliance with Roblox Terms of Service
Genuine skill improvement and satisfaction
Social interaction with other players
More engaging gameplay experience
🤖 Macro Fishing Benefits
24/7 automated grinding capability
Perfect minigame performance
Faster leveling and resource accumulation
Reduced repetitive strain and fatigue
Multi-task while macro runs
Other Roblox Automation Tools
Besides AutoHotkey macros, some players use:
Key Remappers: Tools like AutoHotkey for simple key rebinding (lower risk)
Mouse Recorders: Record and replay mouse movements (similar to macros)
Roblox Exploits: ⚠️ NOT RECOMMENDED – These are highly detectable and will result in immediate bans
⚠️ Avoid Exploits and Executors
Do NOT use script executors, game exploits, or injectors for Roblox. These tools directly modify game files and are instantly detected by Roblox’s anti-cheat, resulting in permanent bans. AutoHotkey macros are safer because they only simulate mouse and keyboard input without modifying game files.
🔄 Staying Updated
📢 Join the Community
For the latest macro updates, bug fixes, and new rod configurations, join the White Sands Macros Discord: 🔗 discord.com/invite/mangos
What to Do When Fisch Updates
Stop using the macro immediately after a major Fisch update
Wait for community confirmation that the macro still works
Check Discord announcements for updated macro versions
Test in a private server first before running on your main account
Update your .ini configs if new rods or mechanics are added
Version History
V12 (Current): Improved minigame stability, 20+ rod configs, Seraphic Rod support
V10: Introduced side bar ratio system, ankle break mechanics
Earlier versions: Basic shake detection and bar tracking
🎉 Ready to Automate Your Fisch Fishing?
You now have everything you need to download, install, and configure the Fisch macro for Roblox. Remember to use responsibly, take breaks, and minimize detection risk.
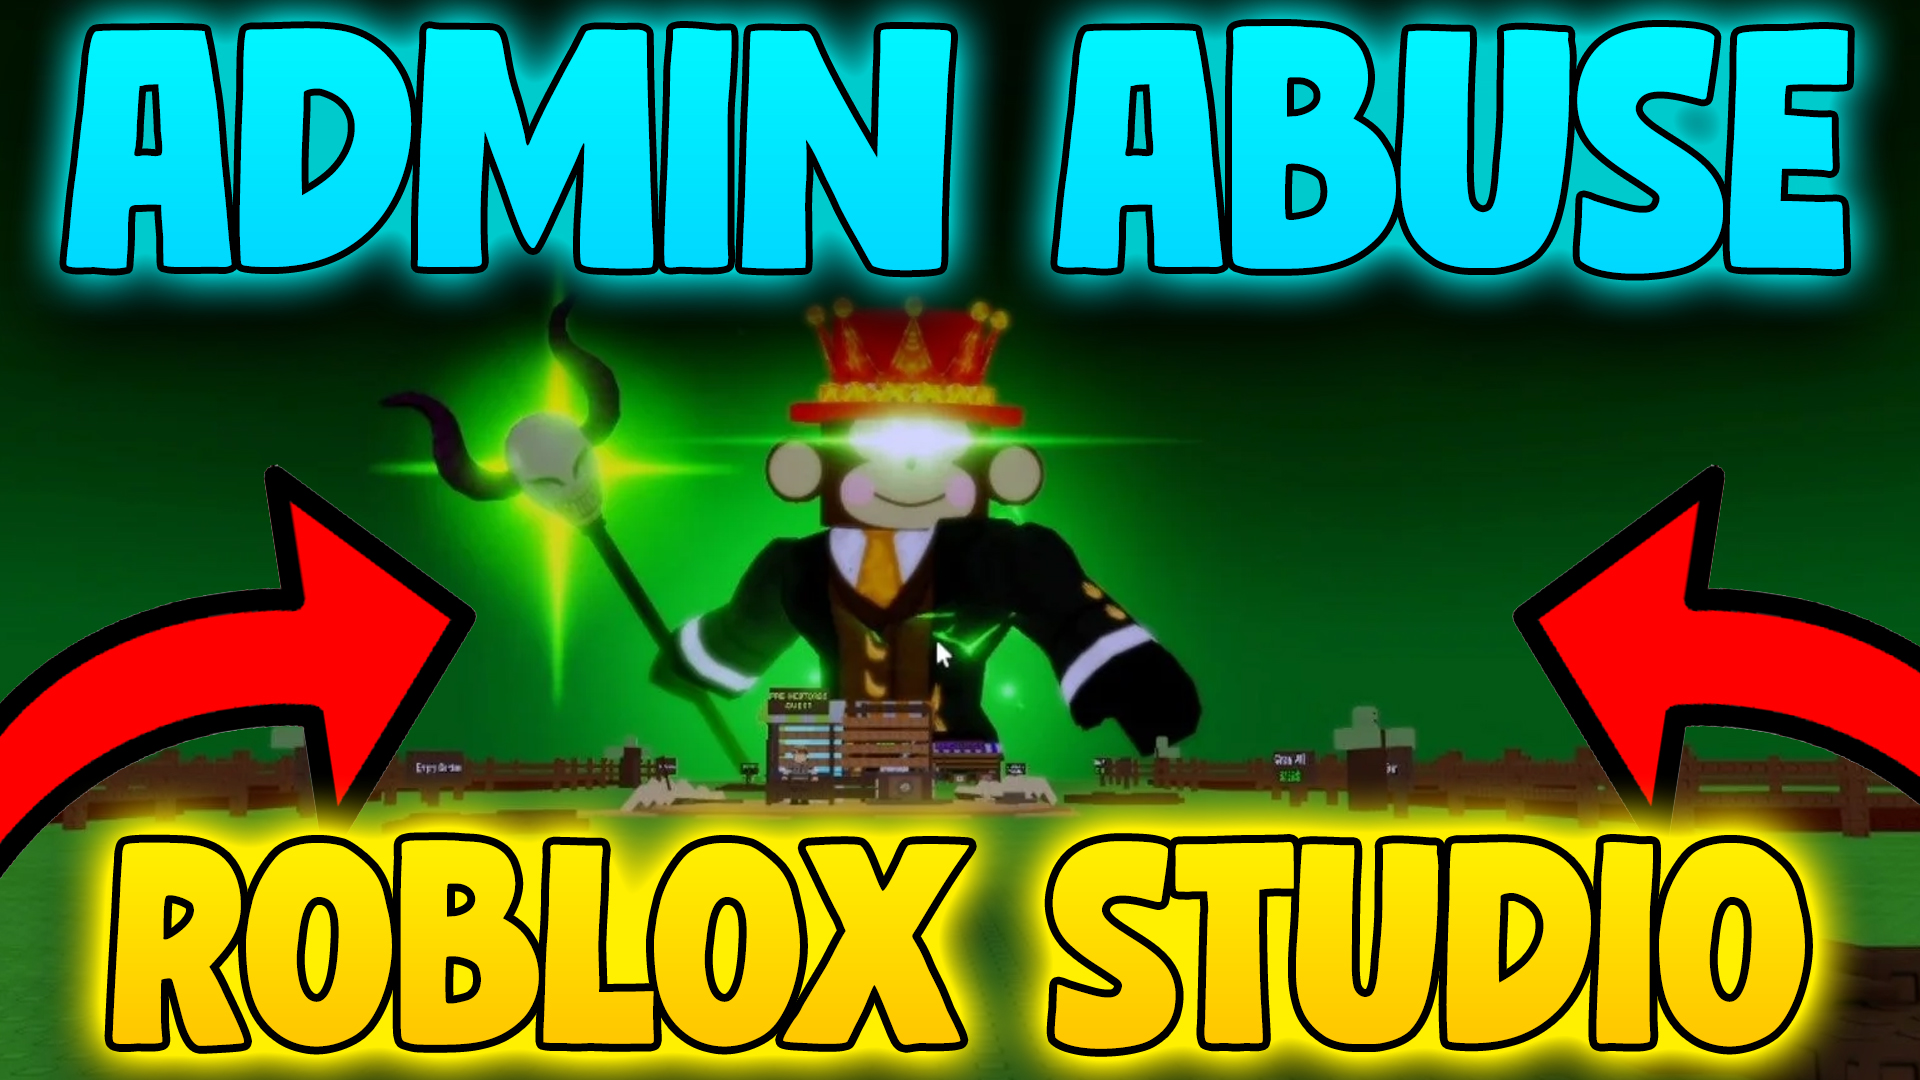
Build a production-ready admin panel for Roblox Studio with server-side validation, cross-server sync via MessagingService, permissions management, player actions, global announcements, and server controls. All scripts included with copy-paste functionality.
✅ All 6 Issues Fixed🔒 Server-Side Validation🌐 Cross-Server Sync📱 Mobile Friendly
📋 Overview
A fully modular, production-ready admin panel for Roblox featuring server-side validation, cross-server synchronization via MessagingService, and a polished, responsive UI. This system includes permissions management, player actions, global announcements, and server controls.
✅ All 6 Known Issues Resolved:
• Panel close button added
• Improved layout with proper spacing
• Working Fly/Invincibility/Invisibility toggles
• Ragdoll effect on fling
• Cross-server luck multiplier sync
• Reduced banner spam with status labels
🎯 Key Features
🔒 Permissions System
Owner with full control
Admin role management
Server-side validation
DataStore persistence
👥 Player Actions
Fling (instant kill)
Freeze (5 seconds)
Toggle Fly (WASD)
Toggle Invincibility
Toggle Invisibility
📢 Announcements
Global cross-server messages
200 char limit
10-second cooldown
Animated banners
⚙️ User Management
Add/remove admins
Username lookup
Owner-only access
In-panel feedback
🎲 Server Controls
Double Luck multiplier
10-minute countdown
Visual timer display
Auto-reset on expiry
🎨 Polish & UX
Responsive design
Mobile-friendly
Smooth animations
Color-coded status
🚀 Installation Guide
Run Setup Script
Place SetupRemotes.lua in ServerStorage, then open the command bar (View → Output) and run: require(game.ServerStorage.SetupRemotes)()
This creates all RemoteEvents and folder structure.
Place Server Scripts
Add to ServerStorage: AdminConfig.lua, AdminActions.lua, ActionControllers.lua, UIThemes.lua
Add to ServerScriptService: AdminCore.lua
Place Client Scripts
Add to StarterPlayer → StarterPlayerScripts: AdminPanelUI.lua, ClientEffects.lua, ClientFlightController.lua
Configure Owner
Open AdminConfig.lua and replace OWNER_USERID = 123456789 with your Roblox UserId.
Test the System
Join game in Studio, click the “ADMIN” button on the right side, and test all features!
📁 File Structure
ReplicatedStorage/
Remotes/ (auto-created)
OpenPanel
RunAdminAction
ServerAnnouncement
ServerBanner
RequestPlayerList
UserAdminChange
LuckMultiplierChanged
SendAnnouncement
DoubleLuck
ServerState/
LuckMultiplier (NumberValue, default 1)
ServerStorage/
AdminConfig.lua
AdminActions.lua
ActionControllers.lua
UIThemes.lua
SetupRemotes.lua
ServerScriptService/
AdminCore.lua
StarterPlayer/StarterPlayerScripts/
AdminPanelUI.lua
ClientEffects.lua
ClientFlightController.lua
📜 All Scripts (Copy & Paste)
Click each section to expand and copy the script. All scripts are ready to use!
📄 SetupRemotes.lua (ServerStorage)
▶
--[[
    SetupRemotes.lua
    Run this ONCE in Studio command bar to create all RemoteEvents and folder structure

    Copy/paste into command bar:
    require(game.ServerStorage.SetupRemotes)()
]]

local ReplicatedStorage = game:GetService("ReplicatedStorage")

local function setup()
    print("[Setup] Creating admin panel structure...")

    -- Create Remotes folder
    local remotes = ReplicatedStorage:FindFirstChild("Remotes")
    if not remotes then
        remotes = Instance.new("Folder")
        remotes.Name = "Remotes"
        remotes.Parent = ReplicatedStorage
    end

    -- Create all RemoteEvents
    local remoteNames = {
        "OpenPanel",
        "RunAdminAction",
        "ServerAnnouncement",
        "ServerBanner",
        "RequestPlayerList",
        "UserAdminChange",
        "LuckMultiplierChanged",
        "SendAnnouncement",
        "DoubleLuck"
    }

    for _, remoteName in ipairs(remoteNames) do
        if not remotes:FindFirstChild(remoteName) then
            local remote = Instance.new("RemoteEvent")
            remote.Name = remoteName
            remote.Parent = remotes
            print("[Setup] Created RemoteEvent:", remoteName)
        end
    end

    -- Create ServerState folder
    local serverState = ReplicatedStorage:FindFirstChild("ServerState")
    if not serverState then
        serverState = Instance.new("Folder")
        serverState.Name = "ServerState"
        serverState.Parent = ReplicatedStorage
    end

    -- Create LuckMultiplier value
    local luckMultiplier = serverState:FindFirstChild("LuckMultiplier")
    if not luckMultiplier then
        luckMultiplier = Instance.new("NumberValue")
        luckMultiplier.Name = "LuckMultiplier"
        luckMultiplier.Value = 1
        luckMultiplier.Parent = serverState
        print("[Setup] Created LuckMultiplier NumberValue")
    end

    print("[Setup] ✓ All remotes and values created successfully!")
    print("[Setup] Next steps:")
    print("  1. Place AdminConfig in ServerStorage")
    print("  2. Place AdminActions in ServerStorage")
    print("  3. Place ActionControllers in ServerStorage")
    print("  4. Place UIThemes in ServerStorage")
    print("  5. Place AdminCore in ServerScriptService")
    print("  6. Place AdminPanelUI in StarterPlayer.StarterPlayerScripts")
    print("  7. Place ClientEffects in StarterPlayer.StarterPlayerScripts")
    print("  8. Set your OWNER_USERID in AdminConfig.lua")
end

return setup
📄 AdminConfig.lua (ServerStorage)
▶
--[[
    AdminConfig.lua
    Manages admin allowlist via DataStore
    Owner-only editing; provides IsAdmin/IsOwner checks
]]

local DataStoreService = game:GetService("DataStoreService")
local Players = game:GetService("Players")

local AdminConfig = {}

-- IMPORTANT: Set your Roblox UserId here as the owner
local OWNER_USERID = 123456789 -- CHANGE THIS TO YOUR USERID

local AdminStore = DataStoreService:GetDataStore("AdminAllowlist_v1")
local ADMIN_KEY = "AllowedAdmins"

-- Cache of admin UserIds
local adminCache = {}

-- Load admins from DataStore on server start
local function loadAdmins()
    local success, data = pcall(function()
        return AdminStore:GetAsync(ADMIN_KEY)
    end)

    if success and data then
        adminCache = data
        print("[AdminConfig] Loaded admins:", table.concat(adminCache, ", "))
    else
        adminCache = {}
        print("[AdminConfig] No admins found in DataStore, starting fresh")
    end
end

-- Save admins to DataStore
local function saveAdmins()
    local success, err = pcall(function()
        AdminStore:SetAsync(ADMIN_KEY, adminCache)
    end)

    if not success then
        warn("[AdminConfig] Failed to save admins:", err)
    end
end

-- Check if userId is the owner
function AdminConfig.IsOwner(userId)
    return userId == OWNER_USERID
end

-- Check if userId is an admin (or owner)
function AdminConfig.IsAdmin(userId)
    if AdminConfig.IsOwner(userId) then
        return true
    end

    return table.find(adminCache, userId) ~= nil
end

-- Add admin by username (owner-only)
function AdminConfig.AddAdmin(operatorUserId, username)
    if not AdminConfig.IsOwner(operatorUserId) then
        return false, "Only the owner can add admins"
    end

    -- Get UserId from username
    local success, userId = pcall(function()
        return Players:GetUserIdFromNameAsync(username)
    end)

    if not success or not userId then
        return false, "User not found: " .. username
    end

    -- Check if already admin
    if table.find(adminCache, userId) then
        return false, username .. " is already an admin"
    end

    -- Add to cache and save
    table.insert(adminCache, userId)
    saveAdmins()

    return true, username .. " added as admin"
end

-- Remove admin by username (owner-only)
function AdminConfig.RemoveAdmin(operatorUserId, username)
    if not AdminConfig.IsOwner(operatorUserId) then
        return false, "Only the owner can remove admins"
    end

    -- Get UserId from username
    local success, userId = pcall(function()
        return Players:GetUserIdFromNameAsync(username)
    end)

    if not success or not userId then
        return false, "User not found: " .. username
    end

    -- Check if in cache
    local index = table.find(adminCache, userId)
    if not index then
        return false, username .. " is not an admin"
    end

    -- Remove from cache and save
    table.remove(adminCache, index)
    saveAdmins()

    return true, username .. " removed from admins"
end

-- Get all admin UserIds
function AdminConfig.GetAdmins()
    return adminCache
end

-- Initialize
loadAdmins()

return AdminConfig
📄 AdminActions.lua (ServerStorage)
▶
--[[
    AdminActions.lua
    Server-side implementations for admin actions
    Includes: Fling, Freeze, ToggleFly, ToggleInvincibility, ToggleInvisibility
]]

local AdminActions = {}

-- Ragdoll helper for R15 rigs
local function ragdollCharacter(character, duration)
    local humanoid = character:FindFirstChildOfClass("Humanoid")
    if not humanoid then return end

    -- Store original state
    local originalState = humanoid:GetState()

    -- Switch to physics state for ragdoll effect
    humanoid:ChangeState(Enum.HumanoidStateType.Physics)
    humanoid.PlatformStand = true

    -- Disable Motor6Ds temporarily for true ragdoll
    local motors = {}
    for _, desc in pairs(character:GetDescendants()) do
        if desc:IsA("Motor6D") then
            table.insert(motors, {motor = desc, enabled = desc.Enabled})
            desc.Enabled = false
        end
    end

    -- Restore after duration
    task.delay(duration, function()
        if character and character.Parent then
            -- Re-enable motors
            for _, data in pairs(motors) do
                if data.motor and data.motor.Parent then
                    data.motor.Enabled = data.enabled
                end
            end

            -- Restore humanoid state
            if humanoid and humanoid.Parent then
                humanoid.PlatformStand = false
                humanoid:ChangeState(Enum.HumanoidStateType.GettingUp)
            end
        end
    end)
end

-- FLING: Throw player in random direction
function AdminActions.Fling(targetPlayer)
    local character = targetPlayer.Character
    if not character then return end

    local hrp = character:FindFirstChild("HumanoidRootPart")
    if not hrp then return end

    -- Generate random direction
    local randomX = math.random(-150, 150)
    local randomY = math.random(100, 200)
    local randomZ = math.random(-150, 150)

    -- Apply velocity
    hrp.AssemblyLinearVelocity = Vector3.new(randomX, randomY, randomZ)
end

-- FREEZE: Anchor character for 5 seconds
function AdminActions.Freeze5s(targetPlayer)
    local character = targetPlayer.Character
    if not character then return end

    local hrp = character:FindFirstChild("HumanoidRootPart")
    if not hrp then return end

    -- Anchor
    hrp.Anchored = true

    -- Unanchor after 5 seconds
    task.delay(5, function()
        if hrp and hrp.Parent then
            hrp.Anchored = false
        end
    end)
end

-- TOGGLE FLY: Set attribute; ActionControllers handles the physics
function AdminActions.ToggleFly(targetPlayer)
    local currentState = targetPlayer:GetAttribute("Admin_Fly") or false
    targetPlayer:SetAttribute("Admin_Fly", not currentState)
    return not currentState -- Return new state
end

-- TOGGLE INVINCIBILITY: Set attribute; ActionControllers handles damage immunity
function AdminActions.ToggleInvincibility(targetPlayer)
    local currentState = targetPlayer:GetAttribute("Admin_Invincible") or false
    targetPlayer:SetAttribute("Admin_Invincible", not currentState)
    return not currentState -- Return new state
end

-- TOGGLE INVISIBILITY: Set attribute; ActionControllers handles transparency
function AdminActions.ToggleInvisibility(targetPlayer)
    local currentState = targetPlayer:GetAttribute("Admin_Invisible") or false
    targetPlayer:SetAttribute("Admin_Invisible", not currentState)
    return not currentState -- Return new state
end

return AdminActions
📄 ActionControllers.lua (ServerStorage)
▶
--[[
    ActionControllers.lua
    Applies and maintains fly/invincible/invisible state based on player attributes
    Handles respawns and state persistence
]]

local Players = game:GetService("Players")

local ActionControllers = {}

-- Store original transparency values for invisibility restoration
local invisibilityData = {}

-- FLY CONTROLLER: Client-controlled WASD flight with server physics
local function setupFlyController(player)
    local character = player.Character
    if not character then return end

    local hrp = character:FindFirstChild("HumanoidRootPart")
    local humanoid = character:FindFirstChildOfClass("Humanoid")
    if not hrp or not humanoid then return end

    -- Check if fly is enabled
    local function updateFly()
        local flyEnabled = player:GetAttribute("Admin_Fly") or false

        if flyEnabled then
            -- Create BodyVelocity for flight control
            if not hrp:FindFirstChild("AdminFlyVelocity") then
                local bodyVel = Instance.new("BodyVelocity")
                bodyVel.Name = "AdminFlyVelocity"
                bodyVel.Velocity = Vector3.new(0, 0, 0)
                bodyVel.MaxForce = Vector3.new(100000, 100000, 100000)
                bodyVel.Parent = hrp

                local bodyGyro = Instance.new("BodyGyro")
                bodyGyro.Name = "AdminFlyGyro"
                bodyGyro.MaxTorque = Vector3.new(100000, 100000, 100000)
                bodyGyro.P = 10000
                bodyGyro.CFrame = hrp.CFrame
                bodyGyro.Parent = hrp
            end

            -- Set humanoid to seated state (prevents walking animations)
            humanoid.Sit = true
            humanoid.PlatformStand = true

        else
            -- Remove fly physics
            local bodyVel = hrp:FindFirstChild("AdminFlyVelocity")
            local bodyGyro = hrp:FindFirstChild("AdminFlyGyro")
            if bodyVel then bodyVel:Destroy() end
            if bodyGyro then bodyGyro:Destroy() end

            -- Restore normal humanoid states
            humanoid.Sit = false
            humanoid.PlatformStand = false
        end
    end

    -- Listen for attribute changes
    local conn = player:GetAttributeChangedSignal("Admin_Fly"):Connect(updateFly)

    -- Initial update
    updateFly()

    -- Cleanup on character removal
    character.Destroying:Once(function()
        conn:Disconnect()
    end)
end

-- INVINCIBILITY CONTROLLER: Prevent damage via HealthChanged
local function setupInvincibilityController(player)
    local character = player.Character
    if not character then return end

    local humanoid = character:FindFirstChildOfClass("Humanoid")
    if not humanoid then return end

    -- Monitor health changes and restore if invincible
    local conn = humanoid.HealthChanged:Connect(function(health)
        local invincible = player:GetAttribute("Admin_Invincible") or false

        if invincible and health < humanoid.MaxHealth then
            humanoid.Health = humanoid.MaxHealth
        end
    end)

    -- Also prevent death state
    local function updateInvincibility()
        local invincible = player:GetAttribute("Admin_Invincible") or false

        if invincible then
            humanoid.Health = humanoid.MaxHealth
            humanoid:SetStateEnabled(Enum.HumanoidStateType.Dead, false)
        else
            humanoid:SetStateEnabled(Enum.HumanoidStateType.Dead, true)
        end
    end

    local attrConn = player:GetAttributeChangedSignal("Admin_Invincible"):Connect(updateInvincibility)
    updateInvincibility()

    -- Cleanup
    character.Destroying:Once(function()
        conn:Disconnect()
        attrConn:Disconnect()
    end)
end

-- INVISIBILITY CONTROLLER: Set transparency on all parts
local function setupInvisibilityController(player)
    local character = player.Character
    if not character then return end

    -- Store original transparency values
    local originalTransparency = {}

    local function applyInvisibility(invisible)
        for _, desc in pairs(character:GetDescendants()) do
            if desc:IsA("BasePart") then
                if invisible then
                    -- Store and hide
                    if not originalTransparency[desc] then
                        originalTransparency[desc] = desc.Transparency
                    end
                    desc.Transparency = 1
                else
                    -- Restore
                    if originalTransparency[desc] then
                        desc.Transparency = originalTransparency[desc]
                    end
                end
            elseif desc:IsA("Decal") or desc:IsA("Texture") then
                if invisible then
                    if not originalTransparency[desc] then
                        originalTransparency[desc] = desc.Transparency
                    end
                    desc.Transparency = 1
                else
                    if originalTransparency[desc] then
                        desc.Transparency = originalTransparency[desc]
                    end
                end
            end
        end

        -- Handle face specifically
        local head = character:FindFirstChild("Head")
        if head then
            local face = head:FindFirstChildOfClass("Decal")
            if face then
                if invisible then
                    originalTransparency[face] = face.Transparency
                    face.Transparency = 1
                else
                    if originalTransparency[face] then
                        face.Transparency = originalTransparency[face]
                    end
                end
            end
        end
    end

    -- Listen for attribute changes
    local function updateInvisibility()
        local invisible = player:GetAttribute("Admin_Invisible") or false
        applyInvisibility(invisible)
    end

    local conn = player:GetAttributeChangedSignal("Admin_Invisible"):Connect(updateInvisibility)
    updateInvisibility()

    -- Cleanup
    character.Destroying:Once(function()
        conn:Disconnect()
    end)
end

-- Setup all controllers for a character
local function onCharacterAdded(player, character)
    setupFlyController(player)
    setupInvincibilityController(player)
    setupInvisibilityController(player)
end

-- Initialize for all players
function ActionControllers.Init()
    Players.PlayerAdded:Connect(function(player)
        player.CharacterAdded:Connect(function(character)
            onCharacterAdded(player, character)
        end)

        -- Handle if character already exists
        if player.Character then
            onCharacterAdded(player, player.Character)
        end
    end)

    -- Setup for existing players
    for _, player in pairs(Players:GetPlayers()) do
        if player.Character then
            onCharacterAdded(player, player.Character)
        end

        player.CharacterAdded:Connect(function(character)
            onCharacterAdded(player, character)
        end)
    end
end

return ActionControllers
Key Features of AdminCore.lua:
• Validates all admin permissions server-side
• Handles RemoteEvent connections
• Manages MessagingService for cross-server sync
• Processes all player actions (Fling, Freeze, Toggles)
• Manages announcements and cooldowns
• Initializes ActionControllers on startup
Key Features of AdminPanelUI.lua:
• Creates the full admin panel GUI
• Handles all UI interactions and tab switching
• Manages player list display
• Sends action requests to server
• Displays status labels for toggles
• Implements announcement interface
📄 ClientEffects.lua (StarterPlayerScripts)
▶
--[[
    ClientEffects.lua
    Handles banner/announcement animations
    Only shows banners for: Announcements and Luck multiplier changes (not toggle spam)
]]

local Players = game:GetService("Players")
local ReplicatedStorage = game:GetService("ReplicatedStorage")
local TweenService = game:GetService("TweenService")

local player = Players.LocalPlayer
local playerGui = player:WaitForChild("PlayerGui")

-- Remotes
local Remotes = ReplicatedStorage:WaitForChild("Remotes")
local ServerAnnouncement = Remotes:WaitForChild("ServerAnnouncement")
local ServerBanner = Remotes:WaitForChild("ServerBanner")
local LuckMultiplierChanged = Remotes:WaitForChild("LuckMultiplierChanged")

-- Banner queue
local bannerQueue = {}
local isShowingBanner = false

-- ========================================
-- BANNER DISPLAY
-- ========================================

local function createBannerGui()
    local screenGui = Instance.new("ScreenGui")
    screenGui.Name = "BannerEffects"
    screenGui.ResetOnSpawn = false
    screenGui.ZIndexBehavior = Enum.ZIndexBehavior.Sibling
    screenGui.DisplayOrder = 10
    screenGui.Parent = playerGui

    return screenGui
end

local bannerGui = createBannerGui()

local function showBanner(text, isAnnouncement)
    -- Create banner frame
    local banner = Instance.new("Frame")
    banner.Name = "Banner"
    banner.BackgroundColor3 = Color3.fromRGB(0, 0, 0)
    banner.BackgroundTransparency = 0.3
    banner.BorderSizePixel = 0
    banner.AnchorPoint = Vector2.new(0.5, 0)
    banner.Position = UDim2.new(0.5, 0, 0, -60)
    banner.Size = UDim2.new(0, 500, 0, 50)
    banner.Parent = bannerGui

    local corner = Instance.new("UICorner")
    corner.CornerRadius = UDim.new(0, 8)
    corner.Parent = banner

    -- Black border
    local stroke = Instance.new("UIStroke")
    stroke.Color = Color3.fromRGB(0, 0, 0)
    stroke.Thickness = 2
    stroke.Parent = banner

    -- Banner text (white)
    local label = Instance.new("TextLabel")
    label.Text = text
    label.Font = Enum.Font.GothamBold
    label.TextSize = 16
    label.TextColor3 = Color3.fromRGB(255, 255, 255)
    label.BackgroundTransparency = 1
    label.Size = UDim2.new(1, -20, 1, 0)
    label.Position = UDim2.new(0, 10, 0, 0)
    label.TextWrapped = true
    label.TextXAlignment = Enum.TextXAlignment.Center
    label.Parent = banner

    -- Animate in
    local tweenIn = TweenService:Create(banner, TweenInfo.new(0.4, Enum.EasingStyle.Back, Enum.EasingDirection.Out), {
        Position = UDim2.new(0.5, 0, 0, 20)
    })

    tweenIn:Play()

    -- Hold for duration
    task.wait(3)

    -- Animate out
    local tweenOut = TweenService:Create(banner, TweenInfo.new(0.3, Enum.EasingStyle.Back, Enum.EasingDirection.In), {
        Position = UDim2.new(0.5, 0, 0, -60)
    })

    tweenOut:Play()
    tweenOut.Completed:Wait()

    banner:Destroy()
end

local function processBannerQueue()
    if isShowingBanner or #bannerQueue == 0 then
        return
    end

    isShowingBanner = true
    local bannerData = table.remove(bannerQueue, 1)

    showBanner(bannerData.text, bannerData.isAnnouncement)

    isShowingBanner = false

    -- Process next in queue
    if #bannerQueue > 0 then
        processBannerQueue()
    end
end

-- ========================================
-- REMOTE LISTENERS
-- ========================================

-- Global announcements (high priority)
ServerAnnouncement.OnClientEvent:Connect(function(text)
    table.insert(bannerQueue, {text = text, isAnnouncement = true})
    processBannerQueue()
end)

-- Generic banners (lower priority, used sparingly)
ServerBanner.OnClientEvent:Connect(function(text)
    -- This is now only used for non-toggle feedback (like errors)
    -- We don't queue these, just show immediately and briefly
    local banner = Instance.new("Frame")
    banner.BackgroundColor3 = Color3.fromRGB(50, 50, 60)
    banner.BorderSizePixel = 0
    banner.AnchorPoint = Vector2.new(0.5, 1)
    banner.Position = UDim2.new(0.5, 0, 1, -20)
    banner.Size = UDim2.new(0, 300, 0, 40)
    banner.Parent = bannerGui

    local corner = Instance.new("UICorner")
    corner.CornerRadius = UDim.new(0, 6)
    corner.Parent = banner

    local label = Instance.new("TextLabel")
    label.Text = text
    label.Font = Enum.Font.Gotham
    label.TextSize = 14
    label.TextColor3 = Color3.fromRGB(255, 255, 255)
    label.BackgroundTransparency = 1
    label.Size = UDim2.new(1, 0, 1, 0)
    label.TextWrapped = true
    label.Parent = banner

    -- Fade out after 2 seconds
    task.wait(2)

    local fadeOut = TweenService:Create(banner, TweenInfo.new(0.3), {
        BackgroundTransparency = 1
    })
    local labelFade = TweenService:Create(label, TweenInfo.new(0.3), {
        TextTransparency = 1
    })

    fadeOut:Play()
    labelFade:Play()
    fadeOut.Completed:Wait()

    banner:Destroy()
end)

print("[ClientEffects] Banner system loaded")
--[[
    ClientFlightController.lua
    Client-side WASD flight controls when Admin_Fly is enabled
    Place in StarterPlayer > StarterPlayerScripts
]]

local Players = game:GetService("Players")
local UserInputService = game:GetService("UserInputService")
local RunService = game:GetService("RunService")

local player = Players.LocalPlayer
local camera = workspace.CurrentCamera

local flySpeed = 50
local flyConnection = nil

-- Track which keys are pressed
local keys = {
    W = false,
    A = false,
    S = false,
    D = false,
    Space = false,
    Shift = false,
    Q = false,
    E = false
}

-- Update flight velocity based on input
local function updateFlyVelocity(character)
    local hrp = character:FindFirstChild("HumanoidRootPart")
    if not hrp then return end

    local bodyVel = hrp:FindFirstChild("AdminFlyVelocity")
    local bodyGyro = hrp:FindFirstChild("AdminFlyGyro")
    if not bodyVel or not bodyGyro then return end

    -- Calculate movement direction
    local moveDirection = Vector3.new(0, 0, 0)

    if keys.W then
        moveDirection = moveDirection + camera.CFrame.LookVector
    end
    if keys.S then
        moveDirection = moveDirection - camera.CFrame.LookVector
    end
    if keys.A then
        moveDirection = moveDirection - camera.CFrame.RightVector
    end
    if keys.D then
        moveDirection = moveDirection + camera.CFrame.RightVector
    end
    if keys.Space then
        moveDirection = moveDirection + Vector3.new(0, 1, 0)
    end
    if keys.Shift then
        moveDirection = moveDirection - Vector3.new(0, 1, 0)
    end

    -- Normalize and apply speed
    if moveDirection.Magnitude > 0 then
        moveDirection = moveDirection.Unit * flySpeed
    end

    -- Update BodyVelocity
    bodyVel.Velocity = moveDirection

    -- Update BodyGyro to match camera orientation
    bodyGyro.CFrame = CFrame.new(hrp.Position, hrp.Position + camera.CFrame.LookVector)
end

-- Start flying
local function startFlying(character)
    if flyConnection then return end -- Already flying

    flyConnection = RunService.Heartbeat:Connect(function()
        updateFlyVelocity(character)
    end)
end

-- Stop flying
local function stopFlying()
    if flyConnection then
        flyConnection:Disconnect()
        flyConnection = nil
    end

    -- Reset all keys
    for key, _ in pairs(keys) do
        keys[key] = false
    end
end

-- Monitor fly attribute changes
local function onCharacterAdded(character)
    local humanoid = character:WaitForChild("Humanoid", 5)
    if not humanoid then return end

    local function checkFlyState()
        local flyEnabled = player:GetAttribute("Admin_Fly") or false

        if flyEnabled then
            startFlying(character)
        else
            stopFlying()
        end
    end

    -- Initial check
    checkFlyState()

    -- Listen for changes
    player:GetAttributeChangedSignal("Admin_Fly"):Connect(checkFlyState)
end

-- Handle input
UserInputService.InputBegan:Connect(function(input, gameProcessed)
    if gameProcessed then return end

    if input.KeyCode == Enum.KeyCode.W then
        keys.W = true
    elseif input.KeyCode == Enum.KeyCode.A then
        keys.A = true
    elseif input.KeyCode == Enum.KeyCode.S then
        keys.S = true
    elseif input.KeyCode == Enum.KeyCode.D then
        keys.D = true
    elseif input.KeyCode == Enum.KeyCode.Space then
        keys.Space = true
    elseif input.KeyCode == Enum.KeyCode.LeftShift then
        keys.Shift = true
    elseif input.KeyCode == Enum.KeyCode.Q then
        keys.Q = true
    elseif input.KeyCode == Enum.KeyCode.E then
        keys.E = true
    end
end)

UserInputService.InputEnded:Connect(function(input)
    if input.KeyCode == Enum.KeyCode.W then
        keys.W = false
    elseif input.KeyCode == Enum.KeyCode.A then
        keys.A = false
    elseif input.KeyCode == Enum.KeyCode.S then
        keys.S = false
    elseif input.KeyCode == Enum.KeyCode.D then
        keys.D = false
    elseif input.KeyCode == Enum.KeyCode.Space then
        keys.Space = false
    elseif input.KeyCode == Enum.KeyCode.LeftShift then
        keys.Shift = false
    elseif input.KeyCode == Enum.KeyCode.Q then
        keys.Q = false
    elseif input.KeyCode == Enum.KeyCode.E then
        keys.E = false
    end
end)

-- Initialize
if player.Character then
    onCharacterAdded(player.Character)
end

player.CharacterAdded:Connect(onCharacterAdded)

print("[ClientFlightController] WASD flight system loaded")
📖 Usage Guide
Player Actions
Action
Description
Duration
Fling
Instantly kills target by throwing them
Instant
Freeze
Anchors player in place
5 seconds
Toggle Fly
WASD flight (W/A/S/D, Space/Shift)
Until toggled off
Toggle Invincibility
Health restoration + damage immunity
Until toggled off
Toggle Invisibility
All parts/accessories transparent
Until toggled off
🎮 Flight Controls:
• W/A/S/D - Move forward/left/backward/right
• Space - Fly up
• Shift - Fly down
• Camera direction controls flight orientation
🧪 Testing Checklist
Permissions & UX
Non-admin cannot see "ADMIN" button
Owner sees button immediately
Panel opens/closes correctly
UI scales at different resolutions
All tabs accessible
Actions & Toggles
Fling kills instantly
Freeze anchors for 5s
Fly works with WASD
Invincibility prevents damage
Invisibility hides all parts
States survive respawn
🐛 Troubleshooting
"ADMIN button not showing"
Verify OWNER_USERID matches your Roblox UserId
Ensure SetupRemotes was run successfully
Check Output for "[AdminCore] Admin system ready!"
Confirm AdminCore is in ServerScriptService
"Toggles not working"
Check ActionControllers is in ServerStorage
Verify attributes are being set (Attributes panel)
Look for errors in Output window
Ensure character exists when toggling
"Luck multiplier not syncing"
Enable API Services (Game Settings → Security)
Note: MessagingService unavailable in Play Solo
Test in published game or Local Server
Check MessagingService quota
🎉 Quick Start Summary
Run SetupRemotes.lua from command bar
Place all 9 scripts in correct locations
Set your UserId in AdminConfig.lua
Join game and click "ADMIN" button
Select player and use actions
Add admins via Users tab (owner only)
✅ That's it! The system is production-ready and fully functional.
Roblox Down? AWS Outage Fix & Status Check (2025 Guide)
Roblox Status
Roblox Down? AWS Outage Explained & What You Can Do
If Roblox isn’t loading, showing “This site can’t be reached” errors, or failing on mobile, it’s likely due to an AWS (Amazon Web Services) outage. This guide explains why it happens, how to check current status, and what steps you can take while waiting for servers to recover.
Roblox AWS outageServer statusService disruption
Check Current Status (Official Links)
Use these official monitoring pages to see real-time server health and outage information:
Pro Tip: Press Ctrl + F5 (Windows) or Cmd + Shift + R (Mac) on the status page to clear cache and see the latest updates.
What’s Happening
Roblox hosted on AWS infrastructure
AWS outage = Roblox can’t be reached
Affects servers, databases, networking, storage
CloudFront and other AWS services degraded
Common Symptoms
“This site can’t be reached” error
Roblox won’t load on mobile or desktop
Games partially load then disconnect
Random login failures
Who’s Affected
PC and Mac users
Mobile (iOS & Android)
Xbox and console platforms
All regions experiencing widespread issues
Why This Happens — AWS Explained
AWS (Amazon Web Services) provides the cloud infrastructure that powers Roblox. This includes:
Servers: Host the Roblox platform and all games
Databases: Store player data, inventory, and progress
Networking: Route traffic between players and game servers
Storage: Save assets, avatars, and user-generated content
When AWS experiences degraded performance or outages, Roblox essentially becomes unreachable. Services like CloudFront (content delivery) are often impacted, causing the “site can’t be reached” error.
Important: This is not a Roblox-specific issue. When AWS goes down, many major online services are affected simultaneously.
Service History: Incident logged with timestamps and duration
Recent Example: If the outage started at 7:00 PM PDT yesterday and service history shows “everything was fine” before that, you can track recovery progress by refreshing the status page.
Why You Can’t Play During an AWS Outage
Even if you occasionally get Roblox to load, you’ll experience:
Random Disconnects: Game servers lose connection to AWS backend
Login Failures: Authentication services are down
Asset Loading Issues: Avatars, items, and game assets won’t load
Data Loss Risk: Progress may not save if database services are affected
Intermittent Access: Some regions or services may work sporadically
The only reliable solution is to wait for AWS to fully restore service to all impacted regions and components.
Filing a Report (Optional)
While Roblox is aware of AWS outages, submitting feedback helps them prioritize:
Look for a “Report” or “Feedback” option (if available)
Describe your issue: platform, error message, time
Include whether you’re on PC, mobile, or console
Roblox typically won’t respond individually, but mass reports help escalate issues.
Preventing Future Frustration
Bookmark Status Pages: Keep links handy for quick checks
Join Community Channels: Discord servers often have real-time updates
Follow Official Accounts: Twitter/X accounts may post outage alerts
Enable Push Notifications: Some status tools offer alerts (third-party)
Check Before Long Sessions: Quick status check before gaming marathons
Frequently Asked Questions
How long do AWS outages usually last?
Most AWS outages are resolved within 1-4 hours. Major incidents can take longer, but AWS prioritizes high-impact services like those used by Roblox.
Will I lose my progress or items?
No. Roblox uses persistent storage that’s backed up. Once AWS recovers, all player data, inventory, and progress will be intact.
Can I do anything to fix it on my end?
No. This is a server-side issue. Restarting your device, clearing cache, or changing DNS won’t help during an AWS outage.
Why does Roblox depend so heavily on AWS?
AWS provides scalable, reliable infrastructure that can handle millions of concurrent players worldwide. It’s industry-standard for large online platforms.
How do I know when Roblox is back online?
Check the Roblox Status Page. When all services show “Operational” and the outage alert is removed, it’s safe to log back in.
Plants vs Brainrot Macro Guide – TinyTask Setup Tutorial
Roblox Guide
Plants vs Brainrot Macro Setup Guide
This step-by-step guide shows you exactly how to set up a plants vs brainrot macro using TinyTask for automated farming. Includes download links, setup instructions, and troubleshooting tips.
Target keyword: plants vs brainrot macro
What you’ll need
TinyTask software (free)
Plants vs Brainrot macro preset file
Roblox account
Plants vs Brainrot game access
Why use a macro
Using a plants vs brainrot macro helps automate repetitive farming tasks, saving time and allowing you to progress while AFK.
Time to complete
Download: 2 minutes
Setup: 5 minutes
Testing: 3 minutes
Total: ~10 minutes
Important Notice: Use macros responsibly and at your own risk. Don’t leave your computer running unattended for extended periods. Balance gaming with other activities and take regular breaks.
Step 1 — Download TinyTask
TinyTask is a free automation tool that records and replays keyboard/mouse inputs.
Click the download button above to visit TinyTask’s official website
Download the latest version (usually a small .exe file)
Extract the file if it’s in a ZIP archive
Run TinyTask.exe (no installation required)
Tip: TinyTask is portable software, so you can run it directly without installing. Some antivirus programs may flag it as suspicious because it simulates keyboard/mouse input, but it’s safe from the official website.
Step 2 — Download the Plants vs Brainrot Preset
This preset contains pre-recorded actions for the plant shop AFK farming routine.
Click the download button above to get the plant shop afk.rec file
Save the file to a location you can easily find (like Desktop or Downloads)
Keep TinyTask open for the next step
Step 3 — Load the Macro in TinyTask
Now we’ll load the preset into TinyTask to prepare it for use.
Open TinyTask if it’s not already running
Click File → Open in TinyTask
Navigate to where you saved plant shop afk.rec
Select the file and click Open
The macro is now loaded and ready to use
Note: You’ll see the recording loaded in TinyTask, but you won’t see the actual commands – that’s normal. The preset contains all the clicks and movements needed for AFK farming.
Step 4 — Setup in Plants vs Brainrot
Position your game correctly before running the plants vs brainrot macro.
Open Roblox and join Plants vs Brainrot
Go to the plant shop area in the game
Position your camera at the default angle (zoom out fully)
Make sure your Roblox window is in windowed mode (not fullscreen)
Resize your window to a standard size (the macro was recorded at a specific resolution)
Important: The macro relies on clicking specific screen positions. If your window size is different, the clicks might miss their targets. Try adjusting your window size if the macro doesn’t work correctly.
Step 5 — Running Your Macro
Follow these steps to start the automated farming:
Make sure you’re in the correct position in-game (plant shop area)
Click on the Roblox window to make it active
In TinyTask, click the Play button (or press the hotkey)
The macro will start replaying the recorded actions
To stop, press the Stop button in TinyTask or use the stop hotkey
Tip: Set TinyTask to loop continuously by clicking the Continuous Playback option (infinity symbol) for true AFK farming.
Troubleshooting
Macro clicks in wrong places
Adjust your Roblox window size
Make sure you’re in windowed mode, not fullscreen
Try repositioning your window to the top-left of your screen
Macro stops working
Check if Roblox disconnected you
Ensure your computer didn’t go to sleep
Restart both TinyTask and Roblox
Nothing happens when I press Play
Make sure the .rec file is properly loaded
Click on the Roblox window before starting
Check if TinyTask has permission to control your mouse/keyboard
Tips for Better Results
Screen Resolution: The macro works best at 1920×1080 resolution
Camera Angle: Reset camera to default before starting
Ping: Lower ping = more reliable macro execution
Background Apps: Close unnecessary programs to prevent lag
Test First: Watch the macro for a few minutes before leaving it unattended
Backup: Keep a copy of the .rec file in case you need it later
Pro Tip: You can record your own custom macros using TinyTask’s Record feature if this preset doesn’t work perfectly for your setup.
Advanced: Creating Your Own Macro
If the preset doesn’t work well or you want to customize your plants vs brainrot macro:
Open TinyTask and click the Record button
Perform the actions you want to automate in Roblox
Click Stop in TinyTask when done
Test the recording by clicking Play
Save your custom macro: File → Save As
Recording Tips: Move slowly and deliberately, wait a moment between clicks, and include a few seconds of waiting at the start/end to make looping smoother.
Frequently Asked Questions
Can I use this on any computer?
Yes, but you may need to adjust window size and positioning. The macro records absolute screen positions.
Will I get banned for using this?
TinyTask is an input recorder, not a game exploit. However, use responsibly and at your own discretion.
Can I use this for other Roblox games?
Yes! You can record custom macros for any repetitive task in any game.
Does this work on Mac?
TinyTask is Windows-only. Mac users can try alternatives like AutoHotkey or Keyboard Maestro.
How long can I run the macro?
Technically indefinitely, but take breaks and don’t leave your computer unattended for too long.
How to Make Custom Leaderstats in Roblox Studio (Copy & Paste Guide)
Roblox Tutorial
How to Make Custom Leaderstats in Roblox Studio (Copy & Paste)
This step-by-step guide shows you exactly how to make custom leaderstats in roblox studio with DataStore saving, coins tracking, kills/deaths system, and test bricks. All scripts are included below in tidy, scrollable embeds with a one-click copy button.
Target keyword: how to make custom leaderstats in roblox studio
What you’ll build
Custom leaderstats (Coins, Kills, Deaths)
DataStore saving system
Kill/Death tracking with creator tags
Test bricks for coins & damage
Why it matters
Knowing how to make custom leaderstats in roblox studio helps you track player progress, create economies, and build engaging progression systems.
Prerequisites
Roblox Studio installed
Basic scripting knowledge
DataStore API understanding
ServerScriptService & Workspace basics
Step 1 — DataStore Setup (Studio Settings)
To use DataStores in Studio for testing, you need to enable API access:
Open Home tab in Roblox Studio
Click Game Settings
Go to Security section
Enable “Enable Studio Access to API Services”
Important: Without this setting, DataStore saving won’t work in Studio when you learn how to make custom leaderstats in roblox studio.
Step 2 — Leaderstats Server Script
Create a Script named Leaderstats.server.lua in ServerScriptService.
-- ServerScriptService/Leaderstats.server.lua
-- Leaderboard stats: Coins, Kills, Deaths (saved with DataStore).
-- Includes kill-credit via Humanoid.creator and a gentle autosave loop.

local Players          = game:GetService("Players")
local DataStoreService = game:GetService("DataStoreService")
local RunService       = game:GetService("RunService")

-- Turn this ON in a published game. In Studio:
-- Home > Game Settings > Security > Enable Studio Access to API Services
local SAVE_ENABLED = true

-- Name your store (bump the version if you change schema)
local DS = DataStoreService:GetDataStore("Leaderstats_V1")

-- Default values on first join
local DEFAULTS = {
	Coins  = 0,
	Kills  = 0,
	Deaths = 0,
}

-- small helper for retries (avoids throttling failures)
local function withRetries(fn, tries)
	tries = tries or 3
	local lastErr
	for i=1,tries do
		local ok, res = pcall(fn)
		if ok then return true, res end
		lastErr = res
		task.wait(0.3 * i)
	end
	return false, lastErr
end

-- Build the leaderstats folder
local function createLeaderstats(player, data)
	local ls = Instance.new("Folder")
	ls.Name = "leaderstats"
	ls.Parent = player

	local coins  = Instance.new("IntValue"); coins.Name  = "Coins";  coins.Value  = data.Coins  or DEFAULTS.Coins;  coins.Parent  = ls
	local kills  = Instance.new("IntValue"); kills.Name  = "Kills";  kills.Value  = data.Kills  or DEFAULTS.Kills;  kills.Parent  = ls
	local deaths = Instance.new("IntValue"); deaths.Name = "Deaths"; deaths.Value = data.Deaths or DEFAULTS.Deaths; deaths.Parent = ls
end

-- Safe load / save
local function loadStats(userId)
	if not SAVE_ENABLED then return table.clone(DEFAULTS) end
	if RunService:IsStudio() then
		-- In Studio this will still work only if "Enable Studio Access to API Services" is ON.
		-- If it's OFF, pcall will fail and we'll fall back to defaults.
	end
	local key = ("u_%d"):format(userId)
	local ok, data = withRetries(function()
		return DS:GetAsync(key)
	end)
	if ok and typeof(data) == "table" then
		for k,v in pairs(DEFAULTS) do if data[k] == nil then data[k] = v end end
		return data
	end
	return table.clone(DEFAULTS)
end

local function saveStats(player)
	if not SAVE_ENABLED then return end
	local ls = player:FindFirstChild("leaderstats")
	if not ls then return end
	local key = ("u_%d"):format(player.UserId)
	local payload = {
		Coins  = (ls:FindFirstChild("Coins")  and ls.Coins.Value)  or 0,
		Kills  = (ls:FindFirstChild("Kills")  and ls.Kills.Value)  or 0,
		Deaths = (ls:FindFirstChild("Deaths") and ls.Deaths.Value) or 0,
	}
	withRetries(function()
		DS:SetAsync(key, payload)
	end)
end

-- Helpers you can call from other server scripts if needed:
local function addCoins(player, amount)
	local v = player:FindFirstChild("leaderstats") and player.leaderstats:FindFirstChild("Coins")
	if v then v.Value = math.max(0, v.Value + math.floor(tonumber(amount) or 0)) end
end
local function addKill(player)
	local v = player:FindFirstChild("leaderstats") and player.leaderstats:FindFirstChild("Kills")
	if v then v.Value += 1 end
end
local function addDeath(player)
	local v = player:FindFirstChild("leaderstats") and player.leaderstats:FindFirstChild("Deaths")
	if v then v.Value += 1 end
end

-- Hook character: on death, +1 Death; if killer exists (Humanoid.creator) => +1 Kill to killer
local function attachDeathTracking(player, character)
	local hum = character:FindFirstChildOfClass("Humanoid")
	if not hum then
		hum = character:WaitForChild("Humanoid", 5)
	end
	if not hum then return end

	hum.Died:Connect(function()
		addDeath(player)
		local tag = hum:FindFirstChild("creator")
		if tag and tag.Value and tag.Value:IsA("Player") then
			local killer = tag.Value
			if killer ~= player then
				addKill(killer)
				-- Optional coin reward on kill:
				-- addCoins(killer, 10)
			end
		end
	end)
end

-- Player lifecycle
Players.PlayerAdded:Connect(function(player)
	local data = loadStats(player.UserId)
	createLeaderstats(player, data)

	player.CharacterAdded:Connect(function(char)
		attachDeathTracking(player, char)
	end)
end)

Players.PlayerRemoving:Connect(saveStats)

-- Periodic autosave (belt & suspenders)
task.spawn(function()
	while true do
		task.wait(120)
		for _, plr in ipairs(Players:GetPlayers()) do
			saveStats(plr)
		end
	end
end)

-- Expose helpers globally (optional)
_G.AddCoins = addCoins
_G.AddKill  = addKill
_G.AddDeath = addDeath
Step 3 — Coin Test Brick (Optional)
Create a Part in Workspace, then add a Script inside the Part.
-- Workspace > Part > Script
-- Touch once per second to gain +5 Coins.

local part = script.Parent
part.Anchored = true
part.CanCollide = true
part.BrickColor = BrickColor.new("Bright yellow")

local cooldown = {}

part.Touched:Connect(function(hit)
	local char = hit and hit.Parent
	local hum  = char and char:FindFirstChildOfClass("Humanoid")
	if not hum then return end
	local plr = game.Players:GetPlayerFromCharacter(char)
	if not plr or cooldown[plr] then return end
	cooldown[plr] = true

	if _G.AddCoins then
		_G.AddCoins(plr, 5)
	end

	task.delay(1, function() cooldown[plr] = nil end)
end)
Step 4 — Damage Test Brick (Optional)
Create another Part in Workspace, then add a Script inside the Part.
-- Workspace > Part > Script
-- Applies 20 damage every 0.5s while touching (good for testing deaths/invincible).

local part = script.Parent
part.Anchored = true
part.CanCollide = true
part.BrickColor = BrickColor.new("Really red")

local DAMAGE_PER_TICK = 20
local TICK = 0.5
local touching = {}

part.Touched:Connect(function(hit)
	local char = hit and hit.Parent
	local hum = char and char:FindFirstChildOfClass("Humanoid")
	if not hum or hum.Health <= 0 then return end

	if not touching[char] then
		touching[char] = true
		while touching[char] and hum.Health > 0 do
			hum:TakeDamage(DAMAGE_PER_TICK)
			task.wait(TICK)
		end
	end
end)

part.TouchEnded:Connect(function(hit)
	local char = hit and hit.Parent
	if char then touching[char] = nil end
end)
Testing Your Leaderstats
Join the game → you’ll see Coins, Kills, Deaths under your name
Touch the yellow brick → Coins increase by 5
Touch the red brick → health decreases, death increments Deaths
Kill another player with tools → Kills increments
Leave and rejoin → stats should be saved (if DataStore is enabled)
Customizing Your Stats
To add more leaderstats when you learn how to make custom leaderstats in roblox studio:
-- Add to DEFAULTS table:
local DEFAULTS = {
    Coins = 0,
    Kills = 0,
    Deaths = 0,
    Level = 1,        -- New stat
    Experience = 0,   -- New stat
}
Advanced Features
Once you understand the basics of how to make custom leaderstats in roblox studio, you can enhance your system:
Level System: Automatically increase level based on experience points
Shop Integration: Use coins to purchase in-game items
Achievements: Award players for reaching kill/coin milestones
Ranking System: Create VIP ranks based on total stats
Daily Rewards: Give bonus coins for daily logins
Pro Tip: The global functions _G.AddCoins, _G.AddKill, and _G.AddDeath can be called from any server script to modify player stats.
How to Make Admin Panel Roblox Studio (Copy & Paste Guide)
Roblox Tutorial
How to Make Admin Panel Roblox Studio (Copy & Paste)
This step-by-step guide shows you exactly how to make admin panel roblox studio with a modern UI, global announcements, fly/invisible/invincible toggles, and a server-wide luck system. All three scripts are included below in tidy, scrollable embeds with a one-click copy button.
Target keyword: how to make admin panel roblox studio
What you’ll build
Clean, scrollable Admin UI
Global announcement toasts
Fly / Invisible / Invincible
Server Luck ×2 with timer HUD
Why it matters
Knowing how to make admin panel roblox studio helps you moderate, test, and manage features quickly without manual commands.
Prerequisites
Roblox Studio installed
RemoteEvents & GUI basics
LocalScripts / Server Scripts
ModuleScripts, DataStores, MessagingService
Step 1 — RemoteEvents Setup (ReplicatedStorage)
Create these RemoteEvents in ReplicatedStorage:
AdminGlobalMessage
GlobalMessage
AdminAction
LuckUpdate
AdminClient
Tip: Exact names are critical when you learn how to make admin panel roblox studio.
Step 2 — AdminPanelClient (LocalScript)
Place at StarterPlayer ➜ StarterPlayerScripts ➜ AdminPanelClient.
-- AdminPanelClient — clean settings UI with scrolling Admin page
-- Features: Announcement, Server Luck, Fly/Invisible/Invincible, Toast, Luck HUD, drag bar, F2 to open

local ReplicatedStorage = game:GetService("ReplicatedStorage")
local TweenService      = game:GetService("TweenService")
local UserInputService  = game:GetService("UserInputService")
local Players           = game:GetService("Players")
local RunService        = game:GetService("RunService")

local player        = Players.LocalPlayer
local EVT_SEND_ANN  = ReplicatedStorage:WaitForChild("AdminGlobalMessage")
local EVT_BROADCAST = ReplicatedStorage:WaitForChild("GlobalMessage")
local EVT_ADMIN_ACT = ReplicatedStorage:WaitForChild("AdminAction")
local EVT_LUCK_PUSH = ReplicatedStorage:WaitForChild("LuckUpdate")
local EVT_ADMIN_CL  = ReplicatedStorage:WaitForChild("AdminClient")

-- ---------- theme ----------
local C = {
	bg=Color3.fromRGB(14,14,18), card=Color3.fromRGB(23,23,29),
	stroke=Color3.fromRGB(38,38,46), text=Color3.fromRGB(235,238,245),
	sub=Color3.fromRGB(160,168,188), blue=Color3.fromRGB(60,110,230),
	green=Color3.fromRGB(90,170,95), gray=Color3.fromRGB(120,120,130)
}
local FT = Enum.Font.Gotham
local FB = Enum.Font.GothamBold

-- ---------- toast ----------
local toastGui = Instance.new("ScreenGui")
toastGui.Name, toastGui.IgnoreGuiInset, toastGui.ResetOnSpawn, toastGui.DisplayOrder = "Toast", true, false, 1500
toastGui.Parent = player:WaitForChild("PlayerGui")

local TOAST_W, TOAST_H, TOAST_Y = 520, 58, 0.32
local toast = Instance.new("Frame")
toast.Size = UDim2.new(0,TOAST_W,0,TOAST_H)
toast.Position = UDim2.new(0.5,-TOAST_W/2,TOAST_Y,0)
toast.Visible = false
toast.BackgroundColor3 = C.card
toast.Parent = toastGui
Instance.new("UICorner", toast).CornerRadius = UDim.new(0,10)
do local s=Instance.new("UIStroke",toast) s.Color=C.stroke s.Thickness=1 end

local toastLabel = Instance.new("TextLabel")
toastLabel.BackgroundTransparency = 1
toastLabel.Size = UDim2.new(1,-24,1,0)
toastLabel.Position = UDim2.new(0,12,0,0)
toastLabel.Font = FB; toastLabel.TextScaled = true
toastLabel.TextColor3 = C.text
toastLabel.Parent = toast

local function showToast(text, color)
	toastLabel.Text = text; toastLabel.TextColor3 = color or C.text
	toast.Visible = true
	toast.Position = UDim2.new(0.5,-TOAST_W/2,TOAST_Y+0.03,0)
	toast.BackgroundTransparency = 0.35
	toastLabel.TextTransparency = 1
	TweenService:Create(toast,TweenInfo.new(0.18,Enum.EasingStyle.Quad,Enum.EasingDirection.Out),
		{Position=UDim2.new(0.5,-TOAST_W/2,TOAST_Y,0), BackgroundTransparency=0.1}):Play()
	TweenService:Create(toastLabel,TweenInfo.new(0.18),{TextTransparency=0}):Play()
	task.wait(2)
	TweenService:Create(toast,TweenInfo.new(0.18,Enum.EasingStyle.Quad,Enum.EasingDirection.In),
		{BackgroundTransparency=0.5}):Play()
	TweenService:Create(toastLabel,TweenInfo.new(0.18),{TextTransparency=1}):Play()
	task.wait(0.2); toast.Visible=false
end
EVT_BROADCAST.OnClientEvent:Connect(showToast)

-- ---------- main panel ----------
local gui = Instance.new("ScreenGui")
gui.Name, gui.IgnoreGuiInset, gui.ResetOnSpawn, gui.DisplayOrder, gui.Enabled =
	"ControlPanel", true, false, 2000, false
gui.Parent = player.PlayerGui

local PANEL_W, PANEL_H = 900, 580
local panel = Instance.new("Frame")
panel.Size = UDim2.new(0,PANEL_W,0,PANEL_H)
panel.Position = UDim2.new(0.5,-PANEL_W/2,0.5,-PANEL_H/2)
panel.BackgroundColor3 = C.bg
panel.Parent = gui
Instance.new("UICorner", panel).CornerRadius = UDim.new(0,12)
do local s=Instance.new("UIStroke",panel) s.Color=C.stroke s.Thickness=1 end
do local p=Instance.new("UIPadding",panel) p.PaddingTop=UDim.new(0,14) p.PaddingLeft=UDim.new(0,14) p.PaddingRight=UDim.new(0,14) end

local title = Instance.new("TextLabel")
title.BackgroundTransparency=1; title.Size=UDim2.new(1,-48,0,42)
title.Text="Settings"; title.Font=FB; title.TextScaled=true; title.TextXAlignment=Enum.TextXAlignment.Left
title.TextColor3=C.text; title.Parent=panel

local closeBtn = Instance.new("TextButton")
closeBtn.Size=UDim2.new(0,36,0,36); closeBtn.Position=UDim2.new(1,-44,0,2)
closeBtn.Text="X"; closeBtn.TextScaled=true; closeBtn.Font=FB
closeBtn.BackgroundColor3=Color3.fromRGB(140,50,50); closeBtn.TextColor3=Color3.new(1,1,1)
Instance.new("UICorner",closeBtn).CornerRadius=UDim.new(0,10)
closeBtn.Parent=panel
closeBtn.MouseButton1Click:Connect(function() gui.Enabled=false end)

-- tabs
local tabs = Instance.new("Frame")
tabs.Position=UDim2.new(0,0,0,52); tabs.Size=UDim2.new(1,0,0,42); tabs.BackgroundTransparency=1; tabs.Parent=panel
local function makeTab(text, x)
	local b=Instance.new("TextButton"); b.Size=UDim2.new(0,180,1,0); b.Position=UDim2.new(0,x,0,0)
	b.Text=text; b.TextScaled=true; b.Font=FB; b.TextColor3=C.text; b.BackgroundColor3=C.card; b.Parent=tabs
	Instance.new("UICorner",b).CornerRadius=UDim.new(0,10)
	do local s=Instance.new("UIStroke",b) s.Color=C.stroke s.Thickness=1 end
	return b
end
local tabAnn = makeTab("Announcement", 0)
local tabAdmin = makeTab("Admin", 190)

local content = Instance.new("Frame")
content.Position=UDim2.new(0,0,0,100); content.Size=UDim2.new(1,0,1,-128)
content.BackgroundTransparency=1; content.Parent=panel

local pageAnn = Instance.new("Frame"); pageAnn.Size=UDim2.new(1,0,1,0); pageAnn.BackgroundTransparency=1; pageAnn.Parent=content
local pageAdmin = Instance.new("Frame"); pageAdmin.Size=UDim2.new(1,0,1,0); pageAdmin.BackgroundTransparency=1; pageAdmin.Visible=false; pageAdmin.Parent=content

local function showPage(w)
	pageAnn.Visible = (w=="ann"); pageAdmin.Visible=(w=="admin")
	tabAnn.BackgroundColor3 = (w=="ann") and C.blue or C.card
	tabAdmin.BackgroundColor3 = (w=="admin") and C.blue or C.card
end
tabAnn.MouseButton1Click:Connect(function() showPage("ann") end)
tabAdmin.MouseButton1Click:Connect(function() showPage("admin") end)
showPage("ann")

-- drag bar
local dragBar = Instance.new("Frame")
dragBar.Size=UDim2.new(1,0,0,8); dragBar.Position=UDim2.new(0,0,1,-8); dragBar.BackgroundColor3=Color3.new(1,1,1)
dragBar.Parent=panel
local function makeDraggable(handle,target)
	local dragging=false; local start; local startPos
	local function upd(input)
		local d = input.Position - start
		target.Position = UDim2.fromOffset(startPos.X.Offset + d.X, startPos.Y.Offset + d.Y)
	end
	handle.InputBegan:Connect(function(i)
		if i.UserInputType==Enum.UserInputType.MouseButton1 or i.UserInputType==Enum.UserInputType.Touch then
			dragging=true; start=i.Position; startPos=target.Position
			i.Changed:Connect(function() if i.UserInputState==Enum.UserInputState.End then dragging=false end end)
		end
	end)
	handle.InputChanged:Connect(function(i)
		if dragging and (i.UserInputType==Enum.UserInputType.MouseMovement or i.UserInputType==Enum.UserInputType.Touch) then
			upd(i)
		end
	end)
end
makeDraggable(dragBar, panel)

-- F2 toggle
UserInputService.InputBegan:Connect(function(input,gpe)
	if gpe then return end
	if input.KeyCode==Enum.KeyCode.F2 then gui.Enabled = not gui.Enabled end
end)

-- ---------- helpers (cards/rows) ----------
local function card(parent, titleText, height)
	local f=Instance.new("Frame"); f.Size=UDim2.new(1,0,0,height); f.BackgroundColor3=C.card; f.Parent=parent
	Instance.new("UICorner",f).CornerRadius=UDim.new(0,12)
	do local s=Instance.new("UIStroke",f) s.Color=C.stroke s.Thickness=1 end
	local pad=Instance.new("UIPadding",f); pad.PaddingTop=UDim.new(0,14); pad.PaddingLeft=UDim.new(0,14); pad.PaddingRight=UDim.new(0,14)

	local t=Instance.new("TextLabel"); t.BackgroundTransparency=1; t.Size=UDim2.new(1,0,0,26)
	t.Text=titleText; t.TextScaled=true; t.Font=FB; t.TextXAlignment=Enum.TextXAlignment.Left; t.TextColor3=C.text; t.Parent=f

	local list=Instance.new("UIListLayout", f); list.Padding=UDim.new(0,10); list.SortOrder=Enum.SortOrder.LayoutOrder
	t.LayoutOrder=0
	return f
end

local function row(parent, main, sub)
	local f=Instance.new("Frame"); f.Name="Row"; f.Size=UDim2.new(1,0,0,64); f.BackgroundColor3=C.card
	f.Parent=parent; f.LayoutOrder=1
	Instance.new("UICorner",f).CornerRadius=UDim.new(0,10)
	do local s=Instance.new("UIStroke",f) s.Color=C.stroke s.Thickness=1 end
	local pad=Instance.new("UIPadding",f); pad.PaddingTop=UDim.new(0,12); pad.PaddingLeft=UDim.new(0,12); pad.PaddingRight=UDim.new(0,12)

	local left=Instance.new("Frame"); left.BackgroundTransparency=1; left.Size=UDim2.new(1,-260,1,0); left.Parent=f
	local title=Instance.new("TextLabel"); title.BackgroundTransparency=1; title.Size=UDim2.new(1,0,0,26)
	title.Text=main; title.TextScaled=true; title.Font=FB; title.TextXAlignment=Enum.TextXAlignment.Left; title.TextColor3=C.text; title.Parent=left
	local desc=Instance.new("TextLabel"); desc.BackgroundTransparency=1; desc.Position=UDim2.new(0,0,0,26); desc.Size=UDim2.new(1,0,0,20)
	desc.Text=sub or ""; desc.TextScaled=true; desc.Font=FT; desc.TextXAlignment=Enum.TextXAlignment.Left; desc.TextColor3=C.sub; desc.Parent=left

	local right=Instance.new("Frame"); right.BackgroundTransparency=1; right.Size=UDim2.new(0,240,1,0); right.Position=UDim2.new(1,-240,0,0); right.Parent=f
	return f, right
end

local function pill(parent, text, color, cb)
	local b=Instance.new("TextButton"); b.Size=UDim2.new(0,120,0,36); b.Position=UDim2.new(1,-120,0.5,-18)
	b.BackgroundColor3=color; b.TextColor3=Color3.new(1,1,1); b.TextScaled=true; b.Font=FB; b.Text=text; b.Parent=parent
	Instance.new("UICorner",b).CornerRadius=UDim.new(0,18)
	b.MouseButton1Click:Connect(function() if cb then cb() end end)
	return b
end

-- ---------- Announcement page ----------
do
	local a = card(pageAnn, "Announcement", 190)

	local r, right = row(a, "Global message", "Broadcast a small popup to all players")

	local input = Instance.new("TextBox")
	input.Size = UDim2.new(1,-130,0,36)          -- BIGGER input
	input.Position = UDim2.new(0,0,0.5,-18)
	input.BackgroundColor3 = Color3.fromRGB(32,32,40)
	input.TextColor3 = C.text; input.PlaceholderText = "type an announcement…"
	input.TextScaled = true; input.ClearTextOnFocus = false; input.Font = FT
	input.Parent = right
	Instance.new("UICorner",input).CornerRadius=UDim.new(0,10)
	do local s=Instance.new("UIStroke",input) s.Color=C.stroke s.Thickness=1 end

	pill(right, "Send", C.blue, function()
		local txt = input.Text
		if txt and #txt > 0 then EVT_SEND_ANN:FireServer(txt, nil); input.Text = "" end
	end)
end

-- ---------- Admin page (scrollable) ----------
local adminCard = card(pageAdmin, "Admin", 430)

-- make a ScrollingFrame inside the card for many rows
local scroll = Instance.new("ScrollingFrame")
scroll.Size = UDim2.new(1,-0,1,-46)
scroll.Position = UDim2.new(0,0,0,46)
scroll.BackgroundTransparency = 1
scroll.ScrollBarThickness = 6
scroll.AutomaticCanvasSize = Enum.AutomaticSize.Y
scroll.CanvasSize = UDim2.new()
scroll.Parent = adminCard

local list = Instance.new("UIListLayout", scroll)
list.Padding = UDim.new(0,10)
list.SortOrder = Enum.SortOrder.LayoutOrder

-- row: Server Luck
do
	local r, right = row(scroll, "Server Luck ×2", "Doubles global luck; stacks and resets the 5:00 timer")
	pill(right, "Activate", C.green, function() EVT_ADMIN_ACT:FireServer("DoubleLuck") end)
end

-- row: Target player
local targetBox
do
	local r, right = row(scroll, "Target player", "Leave blank to target yourself")
	targetBox = Instance.new("TextBox")
	targetBox.Size = UDim2.new(1,0,0,36)
	targetBox.Position = UDim2.new(0,0,0.5,-18)
	targetBox.BackgroundColor3 = Color3.fromRGB(32,32,40)
	targetBox.TextColor3 = C.text; targetBox.PlaceholderText="name (optional)"
	targetBox.TextScaled = true; targetBox.ClearTextOnFocus=false; targetBox.Font=FT
	targetBox.Parent = right
	Instance.new("UICorner",targetBox).CornerRadius=UDim.new(0,10)
	do local s=Instance.new("UIStroke",targetBox) s.Color=C.stroke s.Thickness=1 end
end

-- row: Fly
do
	local r, right = row(scroll, "Fly (toggle)", "Grants flight to the target player")
	pill(right, "Toggle", C.blue, function()
		EVT_ADMIN_ACT:FireServer("FlyToggle", {target = targetBox.Text})
	end)
end

-- row: Invisible
do
	local r, right = row(scroll, "Invisible (toggle)", "Hide character parts/decals for everyone")
	pill(right, "Toggle", C.gray, function()
		EVT_ADMIN_ACT:FireServer("InvisibleToggle", {target = targetBox.Text})
	end)
end

-- row: Invincible
do
	local r, right = row(scroll, "Invincible (toggle)", "Locks Health to MaxHealth")
	pill(right, "Toggle", C.green, function()
		EVT_ADMIN_ACT:FireServer("InvincibleToggle", {target = targetBox.Text})
	end)
end

-- ---------- Luck HUD ----------
local hud = Instance.new("ScreenGui")
hud.Name="LuckHUD"; hud.IgnoreGuiInset=true; hud.ResetOnSpawn=false; hud.DisplayOrder=1100; hud.Parent=player.PlayerGui
local hudFrame = Instance.new("Frame")
hudFrame.Size=UDim2.new(0,210,0,60); hudFrame.Position=UDim2.new(1,-220,1,-70)
hudFrame.BackgroundColor3=C.card; hudFrame.Visible=false; hudFrame.Parent=hud
Instance.new("UICorner",hudFrame).CornerRadius=UDim.new(0,10)
do local s=Instance.new("UIStroke",hudFrame) s.Color=C.stroke s.Thickness=1 end
local hudLabel = Instance.new("TextLabel")
hudLabel.BackgroundTransparency=1; hudLabel.Size=UDim2.new(1,-16,0,24); hudLabel.Position=UDim2.new(0,8,0,6)
hudLabel.Font=FB; hudLabel.TextScaled=true; hudLabel.TextColor3=Color3.fromRGB(120,220,120); hudLabel.Text="luck"; hudLabel.Parent=hudFrame
local hudTimer = Instance.new("TextLabel")
hudTimer.BackgroundTransparency=1; hudTimer.Size=UDim2.new(1,-16,0,22); hudTimer.Position=UDim2.new(0,8,0,32)
hudTimer.Font=FT; hudTimer.TextScaled=true; hudTimer.TextColor3=C.text; hudTimer.Text="00:00"; hudTimer.Parent=hudFrame

local currentMult, secondsLeft, lastTick = 1, 0, 0
local function fmtTime(s) s = math.max(0, math.floor(s)); return string.format("%02d:%02d", math.floor(s/60), s%60) end
local function refreshHUD()
	if secondsLeft > 0 and currentMult > 1 then
		hudFrame.Visible = true
		hudLabel.Text = ("luck  x%d"):format(currentMult)
		hudTimer.Text = fmtTime(secondsLeft)
	else
		hudFrame.Visible = false
	end
end
EVT_LUCK_PUSH.OnClientEvent:Connect(function(mult, secs) currentMult, secondsLeft = mult, secs; refreshHUD() end)
RunService.RenderStepped:Connect(function(dt)
	if secondsLeft > 0 then
		secondsLeft = math.max(0, secondsLeft - dt)
		if math.floor(secondsLeft) ~= lastTick then lastTick = math.floor(secondsLeft); refreshHUD() end
	end
end)

-- ---------- Local Fly controller ----------
local flying=false; local lv,att,ao; local move=Vector3.zero; local up,down=0,0
local function stopFly()
	flying=false; if lv then lv:Destroy(); lv=nil end; if ao then ao:Destroy(); ao=nil end; if att then att:Destroy(); att=nil end
	local ch=player.Character; if ch then local h=ch:FindFirstChildOfClass("Humanoid"); if h then h.PlatformStand=false end end
end
local function startFly()
	local ch=player.Character or player.CharacterAdded:Wait()
	local hrp=ch:WaitForChild("HumanoidRootPart"); local hum=ch:WaitForChild("Humanoid")
	att=Instance.new("Attachment",hrp)
	lv=Instance.new("LinearVelocity",hrp); lv.Attachment0=att; lv.MaxForce=1e6; lv.VelocityConstraintMode=Enum.VelocityConstraintMode.Vector
	ao=Instance.new("AlignOrientation",hrp); ao.Mode=Enum.OrientationAlignmentMode.OneAttachment; ao.Attachment0=att; ao.MaxTorque=math.huge; ao.ReactionTorqueEnabled=true
	hum.PlatformStand=true; flying=true
end
UserInputService.InputBegan:Connect(function(i,gpe)
	if gpe then return end
	if i.KeyCode==Enum.KeyCode.W then move=Vector3.new(move.X,move.Y,-1)
	elseif i.KeyCode==Enum.KeyCode.S then move=Vector3.new(move.X,move.Y,1)
	elseif i.KeyCode==Enum.KeyCode.A then move=Vector3.new(-1,move.Y,move.Z)
	elseif i.KeyCode==Enum.KeyCode.D then move=Vector3.new(1,move.Y,move.Z)
	elseif i.KeyCode==Enum.KeyCode.Space then up=1
	elseif i.KeyCode==Enum.KeyCode.LeftControl then down=1 end
end)
UserInputService.InputEnded:Connect(function(i,gpe)
	if i.KeyCode==Enum.KeyCode.W or i.KeyCode==Enum.KeyCode.S then move=Vector3.new(move.X,move.Y,0)
	elseif i.KeyCode==Enum.KeyCode.A or i.KeyCode==Enum.KeyCode.D then move=Vector3.new(0,move.Y,move.Z)
	elseif i.KeyCode==Enum.KeyCode.Space then up=0
	elseif i.KeyCode==Enum.KeyCode.LeftControl then down=0 end
end)
RunService.RenderStepped:Connect(function(dt)
	if not flying then return end
	local ch=player.Character; if not ch then return end
	local hrp=ch:FindFirstChild("HumanoidRootPart"); if not hrp then return end
	local cam=workspace.CurrentCamera; local cf=CFrame.new(Vector3.zero, cam.CFrame.LookVector)
	local dir=(cf.RightVector*move.X + cf.LookVector*(-move.Z)); local vert=up-down
	local speed=60; lv.VectorVelocity=dir*speed + Vector3.new(0,vert*speed,0)
	ao.CFrame=CFrame.new(Vector3.zero, (dir.Magnitude>0.001 and dir.Unit or cam.CFrame.LookVector))
end)
EVT_ADMIN_CL.OnClientEvent:Connect(function(action)
	if action=="FlyToggle" then
		if flying then stopFly() else startFly() end
		showToast(flying and "fly: enabled" or "fly: disabled", flying and Color3.fromRGB(120,220,120) or Color3.fromRGB(220,120,120))
	end
end)
Step 3 — AdminPanelServer (ServerScriptService)
Create a Script named AdminPanelServer in ServerScriptService.
AdminPanelServer Script
The copy functionality for this script isn’t working properly in the embed.
Add a ModuleScript named LuckManager in ServerScriptService.
-- ServerScriptService/LuckManager (ModuleScript)
-- Global luck that doubles on demand and resets to 5:00. Cross-server in live games,
-- safe no-op for Studio (no DataStore/Messaging errors).

local RunService        = game:GetService("RunService")
local MessagingService  = game:GetService("MessagingService")
local DataStoreService  = game:GetService("DataStoreService")

local LUCK_TOPIC    = "GLOBAL_LUCK_V1"
local LUCK_DS       = DataStoreService:GetDataStore("LuckStateV1")
local DEFAULT_MULT  = 1
local DURATION_SECS = 5 * 60 -- 5 minutes
local IS_STUDIO     = RunService:IsStudio()

local State = { multiplier = DEFAULT_MULT, expiresAt = 0 } -- os.time()
local Subscribers = {}

local function now() return os.time() end
local function secondsRemaining() return math.max(0, State.expiresAt - now()) end

local function pushLocal()
	for _, cb in ipairs(Subscribers) do
		task.spawn(cb, State.multiplier, secondsRemaining())
	end
end

local function applyState(mult, exp)
	State.multiplier = mult
	State.expiresAt  = exp
	pushLocal()
end

local function persist()
	if IS_STUDIO then return end
	local ok, err = pcall(function()
		LUCK_DS:SetAsync("state", { multiplier = State.multiplier, expiresAt = State.expiresAt })
	end)
	if not ok then warn("[Luck] Persist failed:", err) end
end

local function publish()
	if IS_STUDIO then return end
	local ok, err = pcall(function()
		MessagingService:PublishAsync(LUCK_TOPIC, {
			multiplier = State.multiplier,
			expiresAt  = State.expiresAt,
			t          = now(),
		})
	end)
	if not ok then warn("[Luck] Publish failed:", err) end
end

local function load()
	if IS_STUDIO then
		applyState(DEFAULT_MULT, 0)
		return
	end
	local ok, data = pcall(function() return LUCK_DS:GetAsync("state") end)
	if ok and typeof(data) == "table" then
		applyState(tonumber(data.multiplier) or DEFAULT_MULT, tonumber(data.expiresAt) or 0)
	else
		applyState(DEFAULT_MULT, 0)
	end
end

local function subscribe()
	if IS_STUDIO then return end
	local ok, sub = pcall(function()
		return MessagingService:SubscribeAsync(LUCK_TOPIC, function(msg)
			local d = msg.Data
			if typeof(d) ~= "table" then return end
			if typeof(d.multiplier) ~= "number" or typeof(d.expiresAt) ~= "number" then return end
			applyState(d.multiplier, d.expiresAt)
		end)
	end)
	if not ok then warn("[Luck] Subscribe failed:", sub) end
end

local M = {}

function M.Init()
	load()
	subscribe()
end

function M.OnChanged(cb)
	table.insert(Subscribers, cb)
	task.defer(cb, State.multiplier, secondsRemaining())
end

function M.Get()
	return State.multiplier, secondsRemaining()
end

function M.DoubleAndReset()
	local newMult = math.clamp(State.multiplier * 2, 1, 2^30)
	local newExp  = now() + DURATION_SECS
	applyState(newMult, newExp)
	persist()
	publish()
end

function M.Tick()
	if secondsRemaining() <= 0 and State.multiplier ~= DEFAULT_MULT then
		applyState(DEFAULT_MULT, 0)
		persist()
		publish()
	end
end

return M
Testing Checklist
Press F2 to open/close the panel
Send a global message (toast shows on screen)
Toggle Fly, Invisible, Invincible
Activate Server Luck ×2 and watch the HUD timer
Target by partial player name
Confirm the Admin page scrolls fully
Important: Live servers handle DataStores differently. Always test publish/subscribe when you’re serious about how to make admin panel roblox studio.
Restricting Access
Add a simple whitelist in the server script:
local ADMIN_USERIDS = { [123456789]=true, [987654321]=true }
-- before executing actions:
-- if not ADMIN_USERIDS[player.UserId] then return end